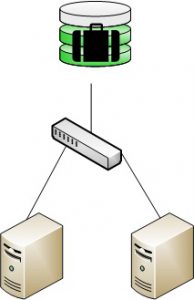
If you want to implement iSCSI it’s best to keep the normal network traffic and the iSCSI traffic apart from each other. And that usually means buying a 2nd switch capable of reaching high speeds and jumbo frames. Off course for production systems I recommend spending a few bucks.. however if you only want iSCSI in you lab, there are easier ways of creating a switch!.
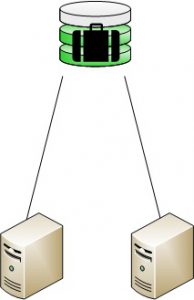
In my lab environment I have two ESX servers and a Windows 2008 x64 machine with the Microsoft iSCSI software on it. I wanted to give both ESX servers a shared iSCSI disk from the Windows 2008 machine without buying additional hardware. Luckily the 2008 machine was equipped with multiple gigabit network cards. Now I could have set an IP address to each card and give each ESX server it’s own additional IP address creating two very small iSCSI networks, but it seems Windows 2008 has some nice features.. network bridging!. We basically tell Windows to create a switch for us by placing multiple NIC’s together and assigning them a single IP address. Both NIC’s share that IP address but keep their own MAC address. This way, we have created a dual port switch that I can connect to each ESX server. This has another advantage too, while a normal switch operates at >4Gb/s internally the uplink to the iSCSI Server is always 1Gb (single adapter) unless we buy a really expensive switch and NIC for the iSCSI server (10Gb/s). In the new bridged mode each ESX server has it’s own 1Gb/s connection to the iSCSI server!
To team: make sure to have two spare NIC’s in the iSCSI server and select both NIC’s by clicking on them and holding CTRL. Now right click one of them and select Bridge Connections.
You will see a new “network adapter” now called Network Bridge. That is the new network adapter that will get the IP address we will be hosting the iSCSI on. Right click it and set the IP address etc etc. Remove the DNS registration option to avoid conflicts in your DNS.
Connect each physical network adapter to the ESX (or other iSCSI client) server and configure the client’s IP address to be in the same subnet as the network bridge. Et Voila! You can add more adapters to the bridge by right clicking them and selecting Add to Bridge.
Now I have used the Microsoft iSCSI software which isn’t available to everyone. But Starwind can help you out there.. they made their product free!.. only the limitation to 2Tb of data, but for a lab environment that should be more than enough! check it out here
Connection diagram


