In a previous post I went into the cloud encryption architectures. One of the topics in the post was the use of your own keys in KeyVault. In this post I’ll go hands-on with an nCipher HSM that their team graciously gave me….. (ok I borrowed it and I have to give it back..) to upload our own keys, use them for services and we get to actually remove the keys and see what happens to our data.
BYOK or Generated Keys?
So, first things first, is it a good idea to Bring-Your-Own-Key to Azure? To repeat from my previous topic:
Do you want to use BYOK? Just because it’s cool to use, doesn’t mean you should use it. Mary Branscombe at Cio.com formulates the question as follows: “Are you ready to become a bank, because you’ll have to run your key infrastructure with the same rigor, down to considering the travel plans of officers of the company. If you have three people authorized to use the smart card that gives access to your key, you don’t ever want to let all three of them on the same plane.”
The process of BYOK
So now that you decided that “yes, you want to be a bank” and you have the infrastructure, but mostly the people to support the processes around it, it’s time to look at how you create your keys. First, the process. As you generate keys in your HSM you want to ensure no-one else has access to them. That is why usually you generate the keys (through your HSM) on an isolated host. A host you can 100% trust, is secure and does not have any spyware stuff on it or even any connection to a network. After you generate the key you set the policies on the key (what can it be used for and such) and you encrypt it with the public key of the Azure KeyVault in your region. Next you copy it to a less-secure workstation with internet connectivity to upload securely it into KeyVault.

The hardware
As indicated, I got a loaner device from nCipher an nShield Edge device which is a small unit that connects to a computer using USB.
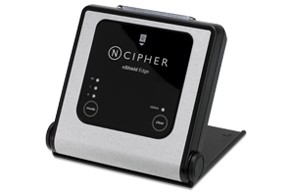
The nCipher Edge device combines a full-featured HSM with a smart card reader, which can be used to securely store and access your keys.
HSM’s are built to generate a key in your own security world thus assuring that this (critical) key is never exposed outside of the HSMs. Using an HSM, you can assure that the custody of your key is maintained according to the strictest industry – well more your own companies – best practices. The ‘cheap’ small form factor nShield Edge from nCipher makes sure you do this without breaking the budget.
When you create the Secure World, you specify the conditions for accessing this world. Each device comes with several smartcards that you protect with a PIN or passphrase when creating the secure world. Per world you specify how many cards are provisioned and how many are required to gain access to a world and the keys in that world. For example:

In the example here, I created a demo world with 1 card and 1 card required for accessing the secure world (–acs-quorum 1/1).
So, you could create a world with 10 cards and 5 required for accessing the secure world but be aware that procedures must be in place for retrieving these cards after employment termination, sickness, damage of the cards, etc. As 50% of the cards in this case are required to gain access, if you loose 6 cards your keys are never retrievable again.
In my example to have 1/1 cards, would definitely not be recommended in production environments.
I could go into the complete step-by-step guide, but instead I’ll point to a link that explains it all up to the detail: https://docs.microsoft.com/en-us/azure/key-vault/key-vault-hsm-protected-keys.
As you go through the guide, you’ll notice that it explains that there are specific commands/keys for each KeyVault pair (based on countries). Microsoft uses separate Key Exchange Key’s (KEK) as well as separate security worlds in each geographical region, which ensures that your key can be used only in data centers in the geographical region for which you encrypted it. For example, a key created for a European KeyVault cannot be used in data centers in North America or Asia-Pacific. If you do want to use a key in multiple geographical regions, you need to prepare separate packages for that same key.
You might ask, why only per country and not per Azure region. This is because your KeyVault contents are replicated to another KeyVault. If the KeyVault in your region fails, the backend will automatically failover to the paired Azure region in read-only mode, in order not to lose dependent services (in other words, your data will still be accessible if the KeyVault in your primary region completely fails)
The keys in Azure
Once you have uploaded one or more keys in Azure, now it’s time to actually use those keys. You can use the keys on multiple services that you want to protect, and there is a list of known services and which key types (BYOK/Managed/MS managed) they actually support.
As you can see, not all services support the (externally) HSM generated keys imported to Azure KeyVault, but let’s go over a few that do.
Customer Managed Keys and Azure Storage
When creating a storage account, you can specify the encryption on it. By default, any storage account has transparent encryption enabled on it, but the standard encryption is based on Microsoft generated and managed keys. There is (by default) no connection to any of your KeyVaults, but you can specify which key to use (BYOK or generated by KeyVault). You can use two types of encryption with your own keys in Azure Storage. Transparent encryption or Customer Managed encryption. The customer provided keys encryption allows you to upload/download data with the key in the connection string, and you can read more about it here. In this tutorial we will look into the more default version of transparent encryption using customer managed keys.
As I followed the guide of creating and uploading a key, I now have a KeyVault with my own generated key. In order to use this key on a storage account, open the storage account properties and select the Encryption blade.
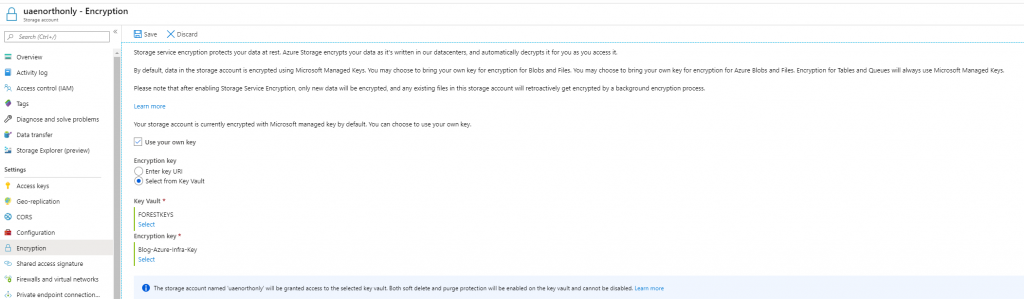
From there, either enter the URI to the key (you can find that in KeyVault itself on the key) or just browse to the key through the portal itself.
After setting this, the storage account will be “re-encrypted” using the key specified. Deleting the key from KeyVault will render all contents of the storage account inaccessible.
The data itself will not be re-encrypted, but the key in KeyVault will be used to unlock the account encryption key (see https://docs.microsoft.com/en-us/azure/storage/common/storage-service-encryption#customer-managed-keys)
The encryption process is fully transparent. You can still connect to the storage account using standard tools as well. It’s when you delete the key from the KeyVault, your connection will be broken, and data would be rendered unreadable. This process is however not instant. It takes a few minutes for the storage account to detect the key deletion (or rather unavailability) then it stops working:

DataLoss Prevention
When a key is deleted, all encrypted data becomes inaccessible and unreadable, which is why it is mandatory to have soft delete and purge protection enabled on the KeyVault itself as soon as you upload your own generated keys into it. The protection ensures that if someone deletes a key, it is retrievable again through a process for at least 90 days. The purge protection will furthermore prohibit forcefully deleting the key for that same 90-day period. This all is to protect you from full data loss due to a deleted key from KeyVault. On KeyVault generated keys, it is possible to delete a key and purge it as well to get rid of it completely.
So, if you wanted to bring your own key to be able to make your data instantly inaccessible if someone knocks on your door, you are in bad luck, unless you get a >90 day notice.
Recovering the key
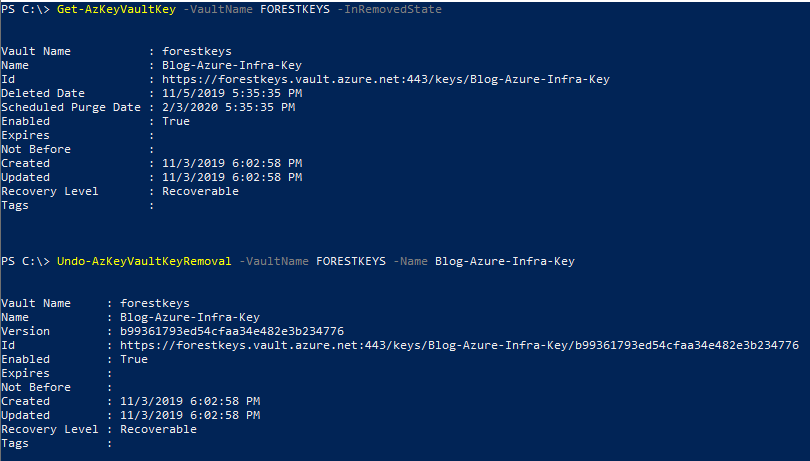
Given the soft-delete is enabled and purge protect is on by default, we can view the deleted key and actually recover it as well. As soon as you do that the data is instantly accessible again:
Azure SQL with BYOK
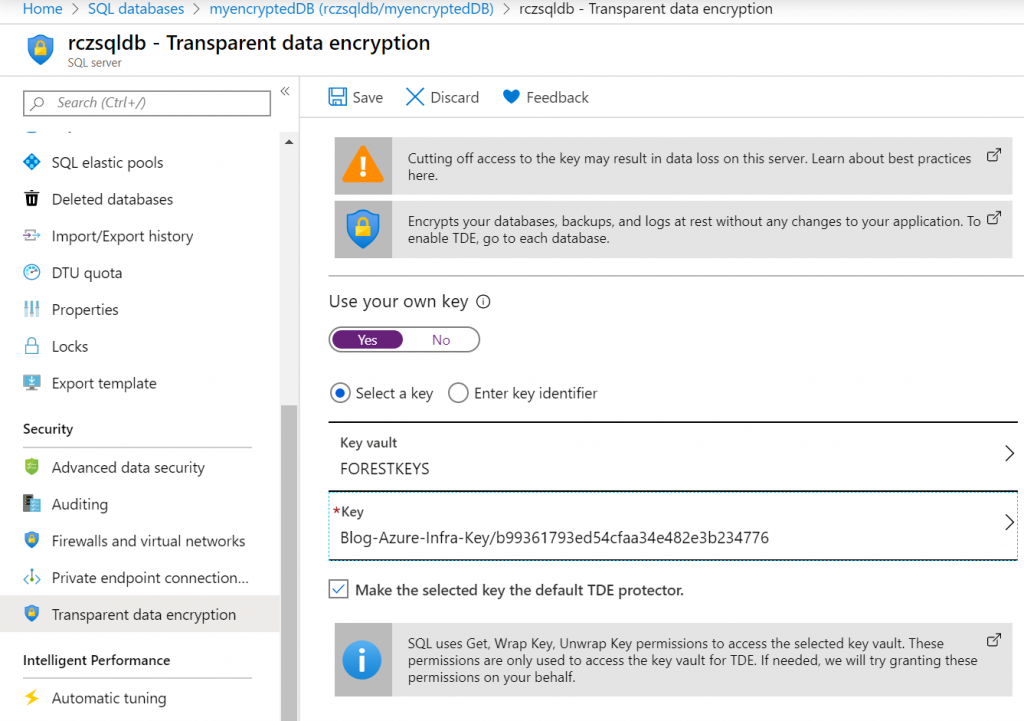
You can enable SQL Transparent Data Encryption using your BYOK as well. The feature implementation is similar to the storage one. Your KeyVault key will be used in combination with an AAD managed identity to wrap the encryption key, and the results of the procedure are the same. If the BYOK key is destroyed or lost, so is all the data in your SQL server and all the databases running on that server using TDE.
In my example I already have a database running, and I will add the BYOK TDE configuration to my database. There are multiple ways to configure the TDE BYOK configuration. Simplest is the portal through the SQL Server page:
If you prefer to use PowerShell rather than the portal as shown above, run the following commands to create and assign a managed AAD identity to the SQL server that will be used to link to the BYOK key and then configuring the SQL server to use the BYOK key for TDE.
(In my example I will use the same key as I used for the storage account, but it is obviously possible – and advised – to create keys for every service)
Creating an identity is simple, open PowerShell and run the following command
$server = Set-AzSqlServer -ResourceGroupName
KeyVaultTest -ServerName azureinfrasql -AssignIdentity
Next, we need to assign the identity access to the KeyVault hosting our keys
Set-AzKeyVaultAccessPolicy
-VaultName FORESTKEYS -ObjectId $server.Identity.PrincipalId -PermissionsToKeys
get, wrapKey, unwrapKey
As we will use the KeyID multiple times, we can add it as a variable:
$key=Get-AzKeyVaultKey
-VaultName FORESTKEYS -Name Blog-Azure-Infra-Key
Next, we configure the SQL server to connect to the key. For this we run:
Add-AzSqlServerKeyVaultKey
-ResourceGroupName $server.ResourceGroupName `
-ServerName $server.servername `
-KeyId $key.id
The KeyID can be found on the key in KeyVault, or through a PowerShell command
Get-AzKeyVaultKey -VaultName FORESTKEYS -Name Blog-Azure-Infra-Key
And finally, we set it as the TDE key in SQL for all resources
Set-AzSqlServerTransparentDataEncryptionProtector `
-ResourceGroupName $server.ResourceGroupName `
-ServerName $server.servername `
-Type AzureKeyVault `
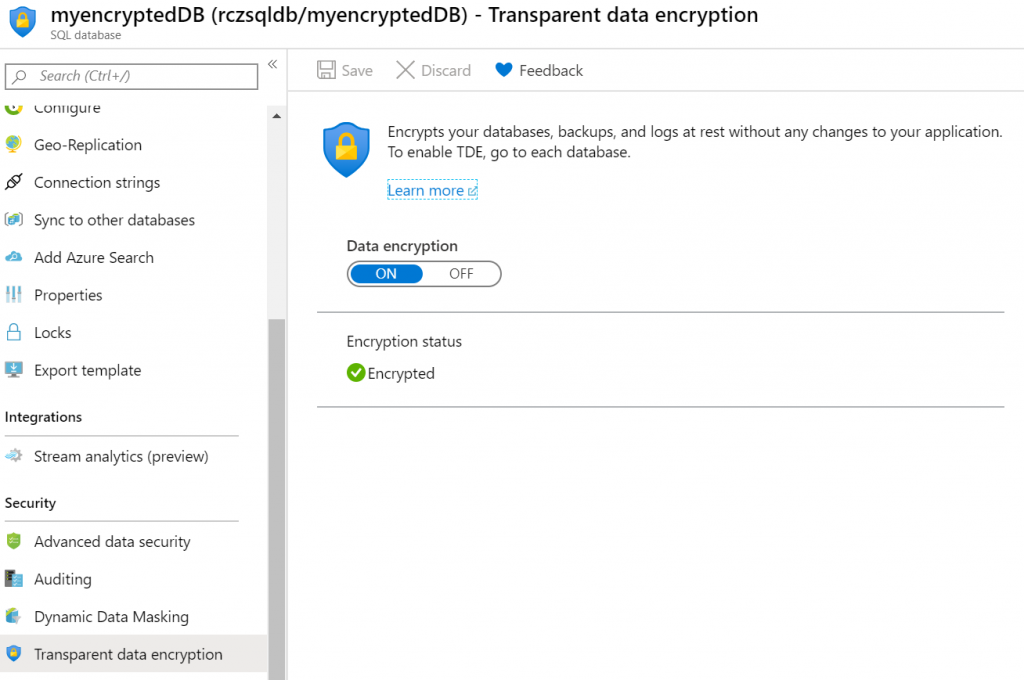
-KeyId $key.id And that is all there is too it, go to your database and switch on TDE
Conclusion
Now the above clearly shows that once a customer managed key (BYOK) is imported, the use of that key is as simple as possible. The problem of using BYOK therefore is not with using the key, its with maintaining the keys on-premises. The burden of managing your own keys, usually far outweighs the advantages of it. With Azure KeyVault having three options (fully managed, HSM backed managed and BYOK [customer managed]) you have the option of making it easy and secure all-in-one. Only if it is required for compliance, or you already have a fully fledged HSM infrastructure and procedures, it makes sense to use BYOK, else stick with “just because you can, doesn’t mean you should”.
As I get to play around with the device a bit more in the coming months, I’ll try to upload some other use case scenario’s, such as O365 integration, on-premises integration and others. If you have a specific use-case you want me to publish, let me know through the “About” page..