As Microsoft enabled the Radius option in the Azure Gateway VPN configuration, it now means you can enable MFA on your P2S connections!
There is a caveat however. It only works if you have replicated your users from an Active Directory into Azure Active Directory. If you have cloud-only user, it doesn’t work (yet..) I’ll try to configure it also on an AAD-Domain Services setup.. should work just the same
To start configuring, I did the following already
- Install a Domain Controller on a VM (on-premises or in Azure)
- Configure Azure AD Connect and sync the users up to Azure AD
- Create a VNET + Virtual Network Gateway
- Make sure the Azure Virtual Network Gateway is able to connect to the Radius Server
- By either putting it on the same VNET, or through a S2S connection
- Opening the Radius ports on a public IP address (not recommended)
- And that’s it where we kick it off
In Azure, go to the Virtual Network Gateway and configure the P2S configuration:
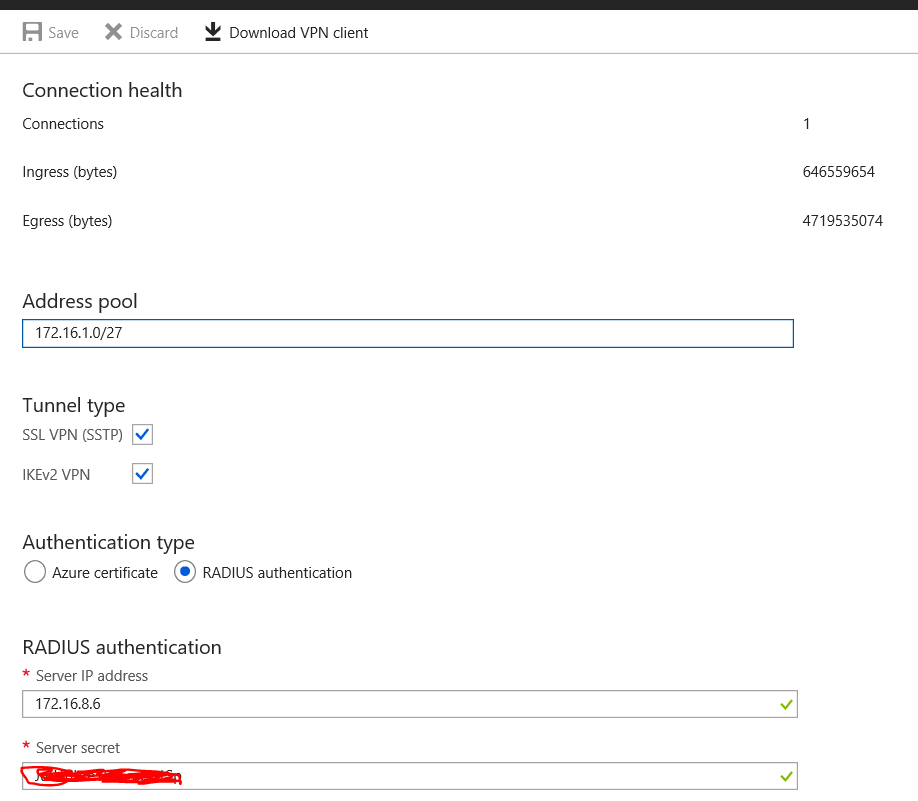
As we can see in the picture above, I have configured an address pool. This is the pool of IP addresses from which one will be assigned to connecting clients. As I want to ensure I support Ikev2 as well as SSTP, I’ve enabled both options.
Instead of the standard certificate authentication I’ve enabled the radius authentication and provided the private IP of the domain controller. Also I entered a Server Secret which we need to configure in the domain controller later on as well.
Now the next part of the configuration needs to be done in the Radius Server itself. Obviously the Radius server needs to be on the same domain as the domain controller from which we replicate the users, or a trust needs to exist between the domains. In any case, the Radius server needs to be able to authenticate the users.
To start:
- Install Radius Services from the server manager; this is part of the Network Policy and Access Services
- After installing, configure it with the following policies:

The connection request policy basically states, everyone can authenticate Any day, any time, and authentication is performed against the Local Computer.
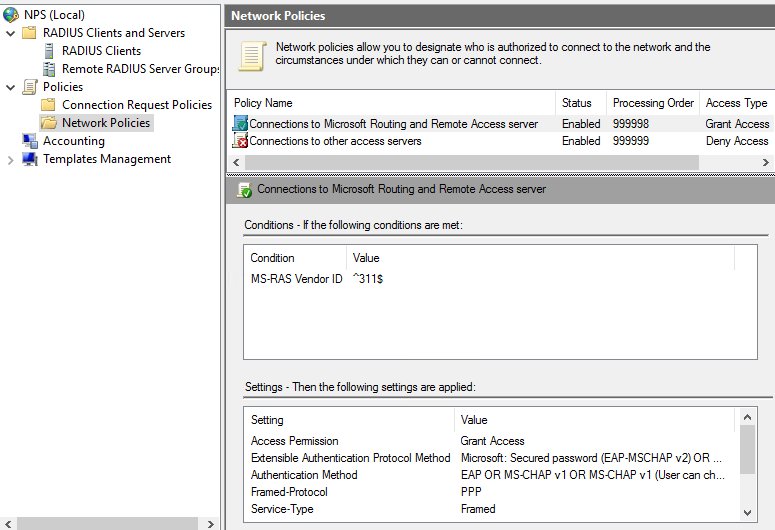
A network policy should also be configured, this has a bit more settings:
| Attribute | Value |
| Policy Enabled | Enabled |
| Access Permission | Grant Access is the connection request matches this policy |
| Ignore user account dial-in properties | <unchecked> |
| Type of network access server | Unspecified |
| Conditions | |
| MS-RAS Vendor ID | ^311$ |
| Constraints | |
| Authentication Methods | Microsoft: Secured password (EAP-MSCHAP v2) Microsoft: Smart Card or other certificate |
| Settings | |
| Standard | Framed Protocol PPP Service-Type: Framed |
| Vendor Specific | |
| Encryption | Basic (MPPE 40-bit )Strong (MPPE 56 bit) Strongest (MPPE 128 bit) |
| IP Settings | Server settings determine IP address assignment |
This takes care of the configuration, except for one more thing. The radius server needs to have the MFA agent installed. Follow the instructions from
https://docs.microsoft.com/en-us/azure/active-directory/authentication/howto-mfa-nps-extension
Also, make sure to configure the MFA for the user by going to for example myapps.microsoft.com while enforcing MFA. The MFA for the user needs to be configured prior to creating a connection as the VPN cannot configure MFA for the user.
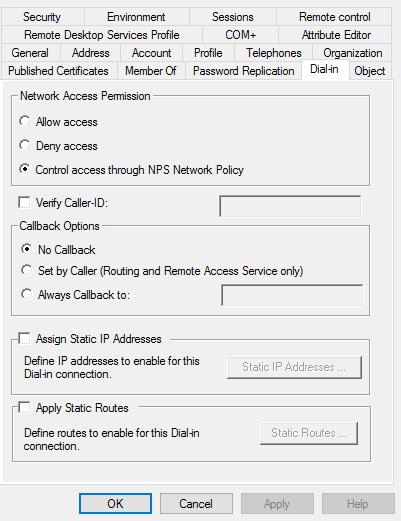
Finally, you need to enable your user to allow for Radius “dial-in”. For this, open the properties on a user account and select enable or the Control access through NPS network policy
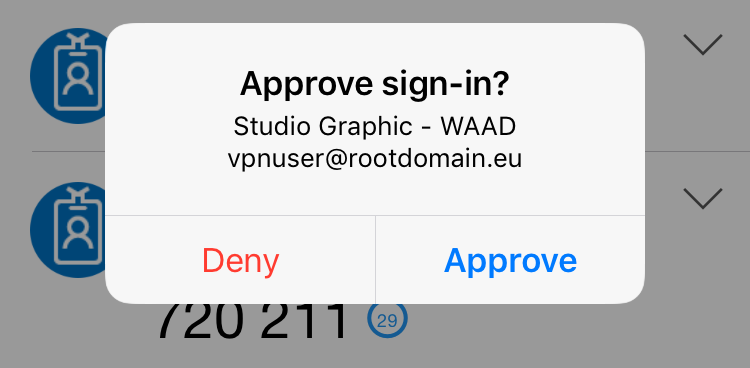
Once this is all done, download the VPN client from the portal and login with the user and their password:
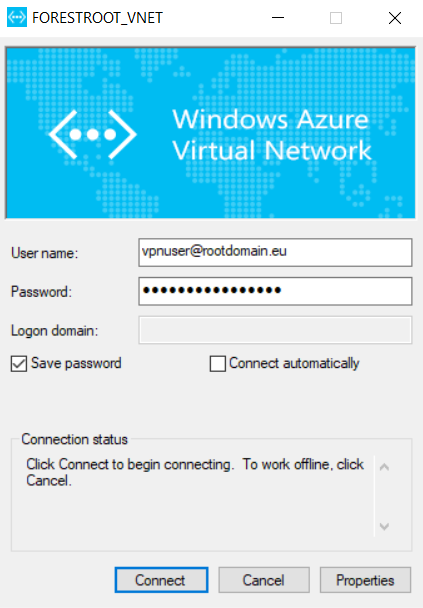
And you will receive a pop-up on your screen for authentication!
And you are connected!