My posts on the ImmutableID seem to continue attraction from all over the world, and thus, let’s continue the fun. In a new series of posts we will be looking at the influence of the ImmutableID and Cross-Forest Anchor (name given by me, not sure if it is the actual name for it) in an ADMT cross-forest migration scenario. Or in other words, how can we make sure to keep the AAD (/Office 365) user the same, while migrating the backend user between forests.
In the first part we will go over the tools and show how certain things work in the back-end by importing duplicate users.
Infrastructure setup
First the setup, I have 1 AAD and 2 AD’s; FORESTOOT.local is the source and TARGET.local is the target AD forest. While Forestroot.local is based on Windows 2016, TARGET is based on 2012R2, just for the sake of showing this will work also on older AD implementations.
In the target.local domain I have a member server that will function as the ADMT and AAD Connect server.
First things first, let’s install ADMT:
- On Target.local
- Create a new user “admt-admin”
- Add the user to Domain Admins
- Create the Forest trust to Forestroot.local can be one way or two way)
- On the PDC of Forestroot.local:
- Create a local domain security group called FORESTROOT$$$
- Create the Registry Entry: TcpClientSupport = 1 (DWORD) under HKLM/CCS/Control/LSA
- Enable Account Management Audit (success / failure) in the Default Domain Controller Policy
- Add admt-admin to the Built-in\Administrators group
Login to the ADMT member server as admt-admin and install ADMT
Secondly, let’s install AAD Connect:
I already have AAD Connect on my Forestroot domain controller. But given we are now going to use 2 forests, we have to be able to select our immutableID and cross-forest anchor. Furthermore, usually these migrations end-up in removing the source forest all together, so we’d need to install AAD Connect again anyway.
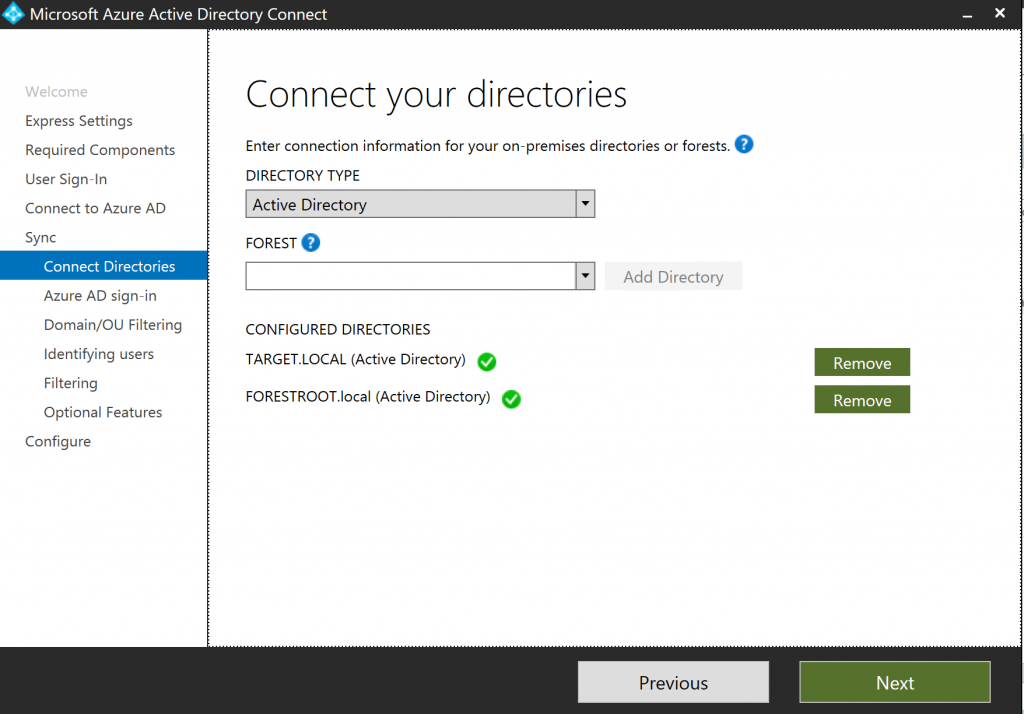
The idea here is to install the 2nd AAD Connect in Staging mode only. This allows us to review the configuration, the exported objects and if indeed our ruleset and settings replace the backend accounts on our AAD users, rather than creating new ones, or removing them! (which can happen in a faulty config). So on the ADMT server, install AAD Connect and choose the custom installation option, add both forests to the configuration:
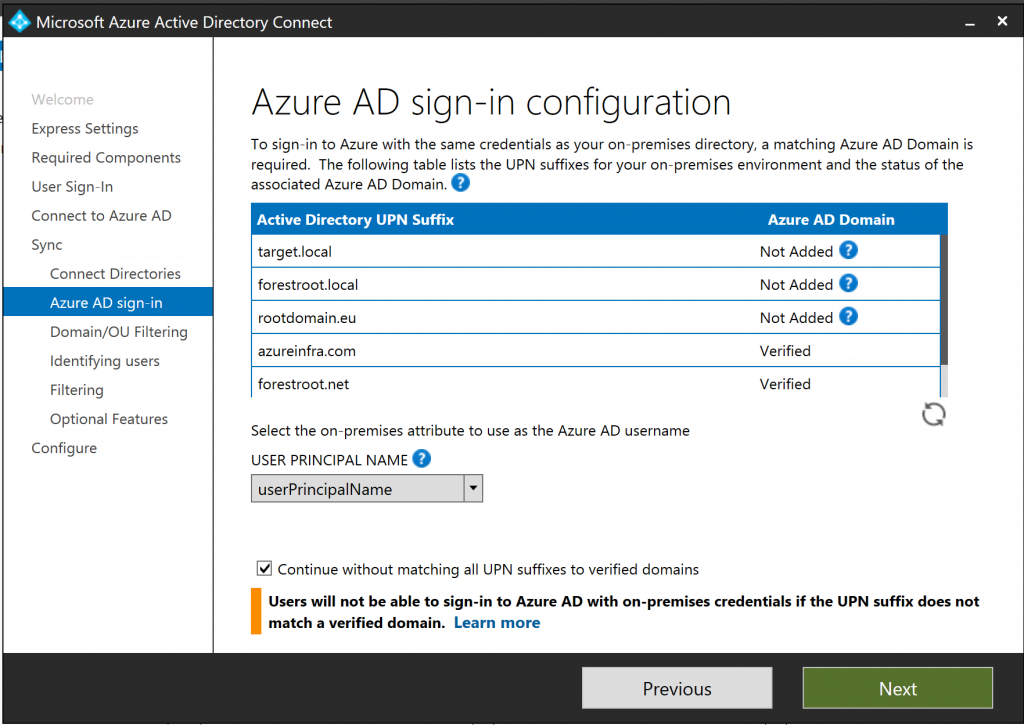
On the UPN screen, select Continue without adding UPN suffixes to verified domains. This is because we don’t want to interrupt the UPN routing between the two domains as part of the forest trust. When we migrate the users, we will also migrate their UPN itself.
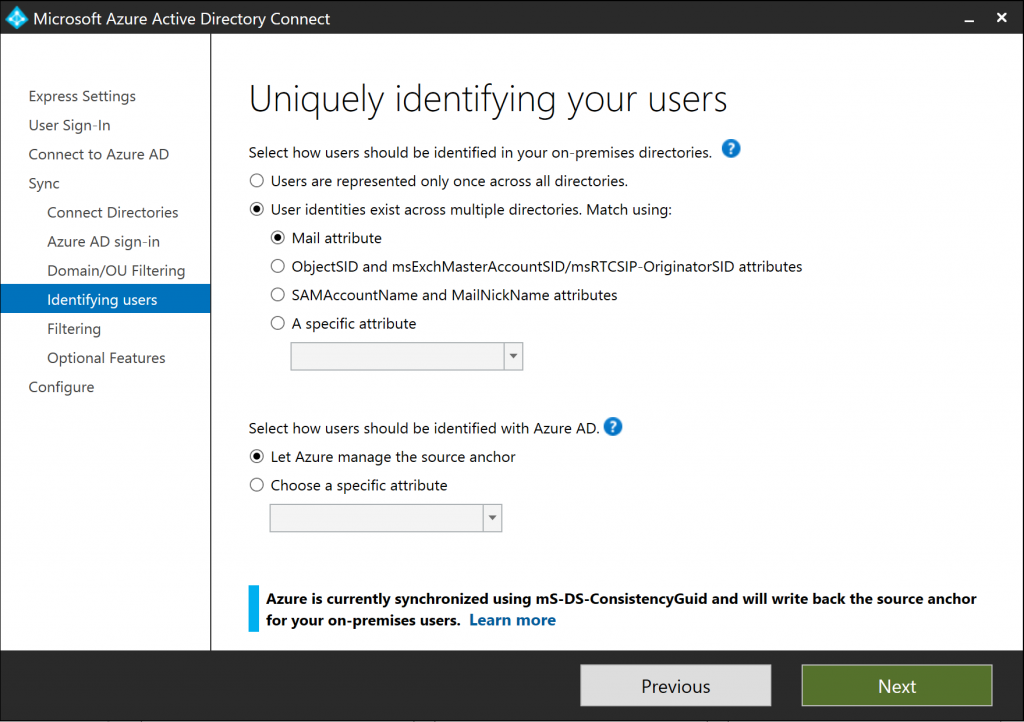
Next is the screen for uniquely identifying our users, in this screen there are two settings that need to be configured.
First is the what I call Cross-Forest Anchor. This attribute identifies a single user having two accounts (one in each forest). The link between the two can be based on any attribute, but usually it is the mail attribute field, or in the case of an Exchange ResourceForest, it is the ObjectSID and the msExchangeMasterAccountSID (the 2nd option). It is also possible that the sAMAcountName is the same (but not usually).
I’ve configured the system to use PassThrough Authentication. This is to make things a bit more complex, the easiest would be to use Password Sync and the hardest would be to use Federation (in case the UPN of the user does not change), but we will cover the authentication part later.
If two of “the same” users are found that don’t have a matching attribute, two things can happen. The users get removed from the metaverse (as we will see later), or two accounts are created in AAD.
The second option is the ImmutableID. In the later versions of AAD Connect, when choosing Let Azure manage the source anchor, the ObjectGUID of the user is automatically copied into the ms-DS-ConsistencyGuid attribute and that is used for the anchor. But you can also specify your own anchor.
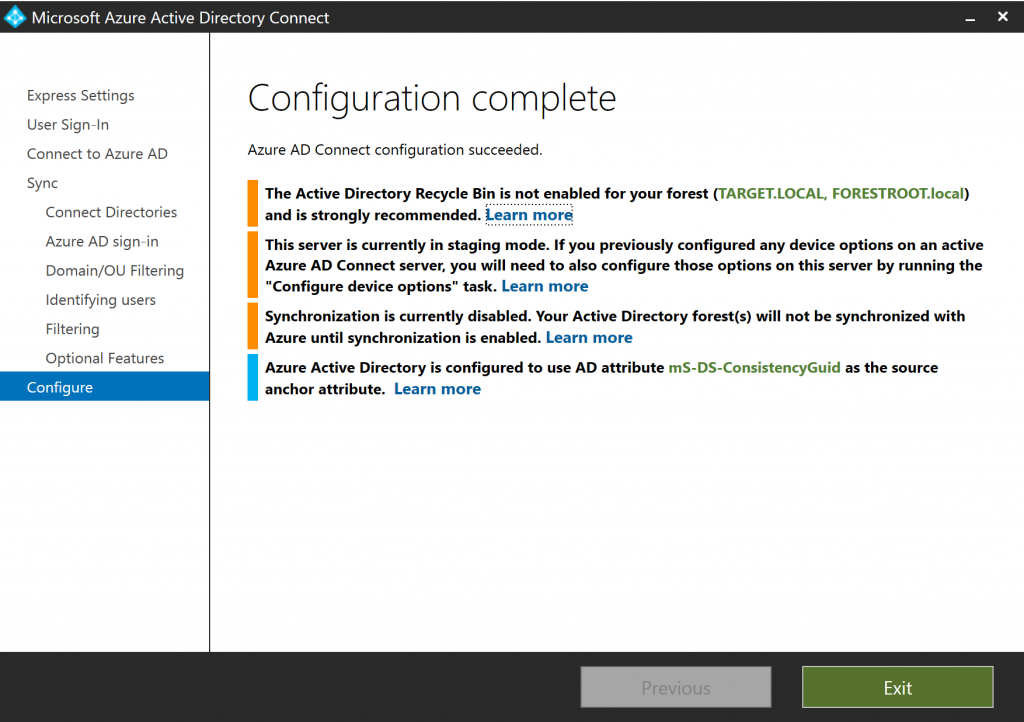
In our previous posts, this anchor was used to match two user objects to a single AAD user in the metaverse. But with the later versions, the Cross-Forest Anchor does this for us automatically. As I want to use the default ms-DS-ConsistencyGuid anyway, I left it to the default setting. I finished the installation of AAD Connect, but making sure to select Staging mode.
The initial look
We will start by creating duplicate accounts, and matching them on email attribute.
I created two accounts:
FORESTROOT\duplicateUser e-mail:
duplicateuser@azureinfra.com
TARGET\targetduplicate e-mail:
duplicateuser@azureinfra.com
Now we open the MIISClient, so we can see under the hood what’s actually going on. Go to C:\Program Files\Microsoft Azure AD Sync\UIShell and open MIISClient.exe
Under the connectors tab, we see 3 connectors, one to the AAD tenant, and two for AD (Forestroot / Target)
The way MIIS (AAD Connect is based on it), works, is that there is a metaverse. A central database with all our users, groups and other objects. Each Connector also has a connector space. This space is a 1:1 match to the connected system (in this example AD). It keeps track of all the imported and ready to be exported objects. The system works as follows: An Import reads the source (AD) and puts all the objects in the Connector Space. A Synchronization moves the objects into the metaverse, keeping track of all the rules that apply to this connector (for example, joins, renames, etc). Once a change in the metaverse for an object is detected it is placed in the connector space ready for export. And on an export job, it actually pushes the changes to the connected system.
Right-click the AD connectors, and select Full Import, once completed, right click TARGET and select Full Synchronization. This ensures that our initial object is in the metaverse. On the FORESTROOT connector, we are going to perform some investigations (to learn what happens). Right click the connector and select Search Connector Space. Leave the Scope to Sub-Tree and click search.
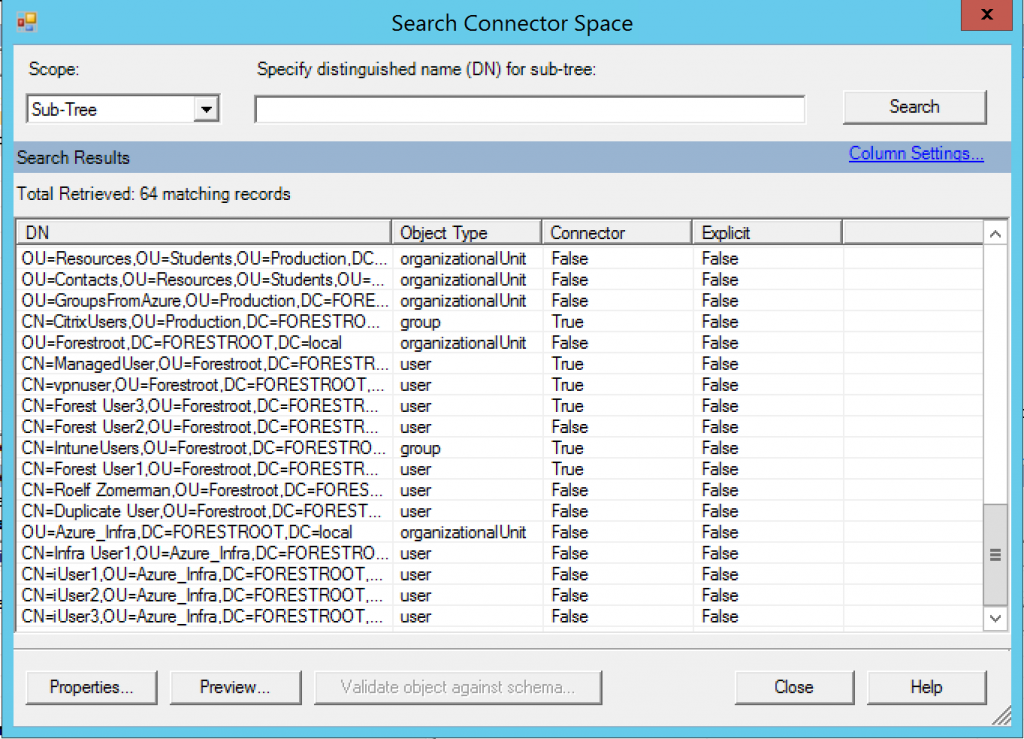
The list shown is the list of users in the connector space only. This is the 1:1 copy of the AD information, but it’s not yet in the metaverse itself. In the list you will find our Duplicate User. Click it and select properties (or double click).
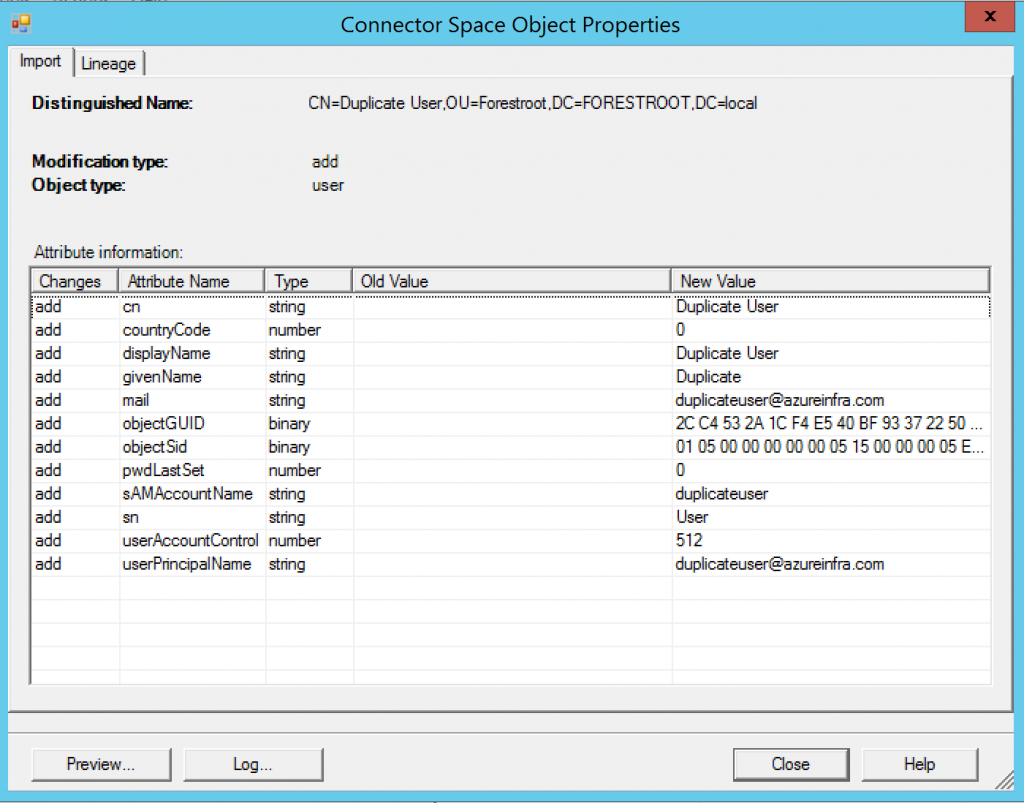
The pop-up shows you the user and the changes (add to the system in this case) and the attributes that have been read from the user. Given this user does not have a lot of attributes set, there is only a limited set imported.
Before actually moving/importing the user in the metaverse, we can run a simulation. This can be done by clicking Preview..
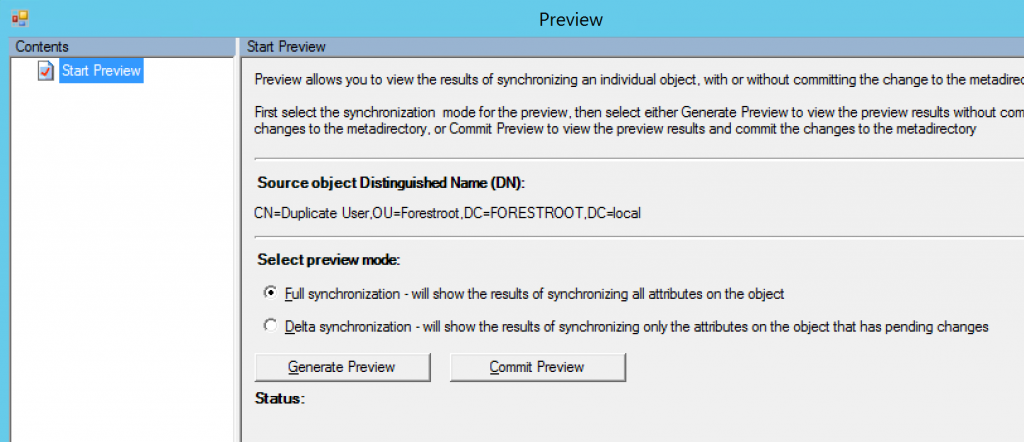
There are two options available, delta and full. In this case it doesn’t really matter which one you choose, so we will go ahead with the Full Synchronization – Click Generate Preview
The preview generates what would happen to this particular object if a full sync would be executed.
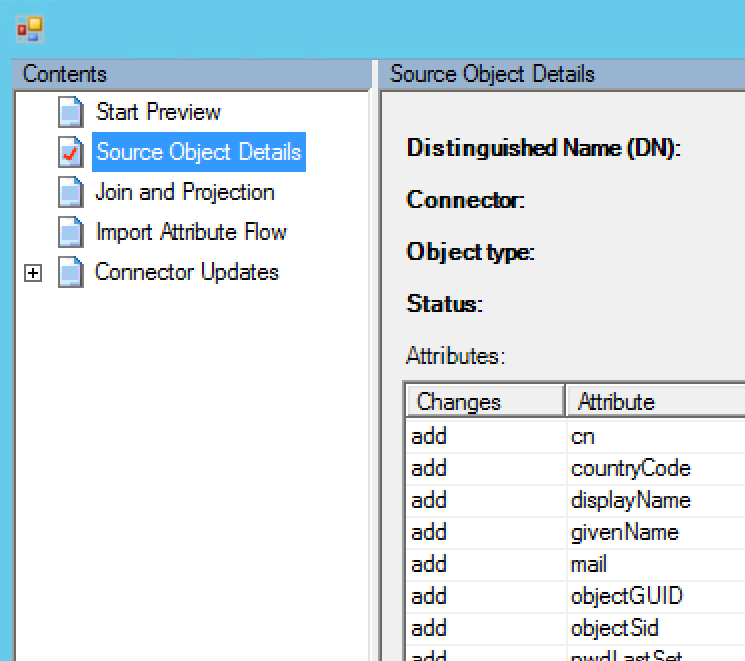
It shows the Source Object Details similar to the ones shown before, but in our case more importantly, there is a Join and Projection tab available too. This one shows us that this object would be matched (joined) to an existing object in the metaverse (remember, we already imported the user from the TARGET AD and that was already synchronized to the MetaVerse).
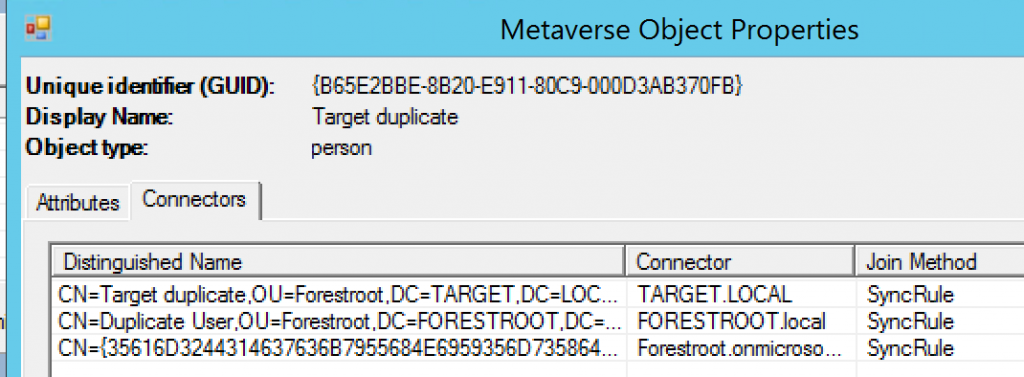
Go back to the Start Preview tab, and click Commit (a warning will show indicating a new preview will be re-generated). By issuing the commit, we now have successfully copied the object into the metaverse and now should have a single object with 3 connectors in the metaverse. To check, close all the pop-up windows and select metaverse, and then search:
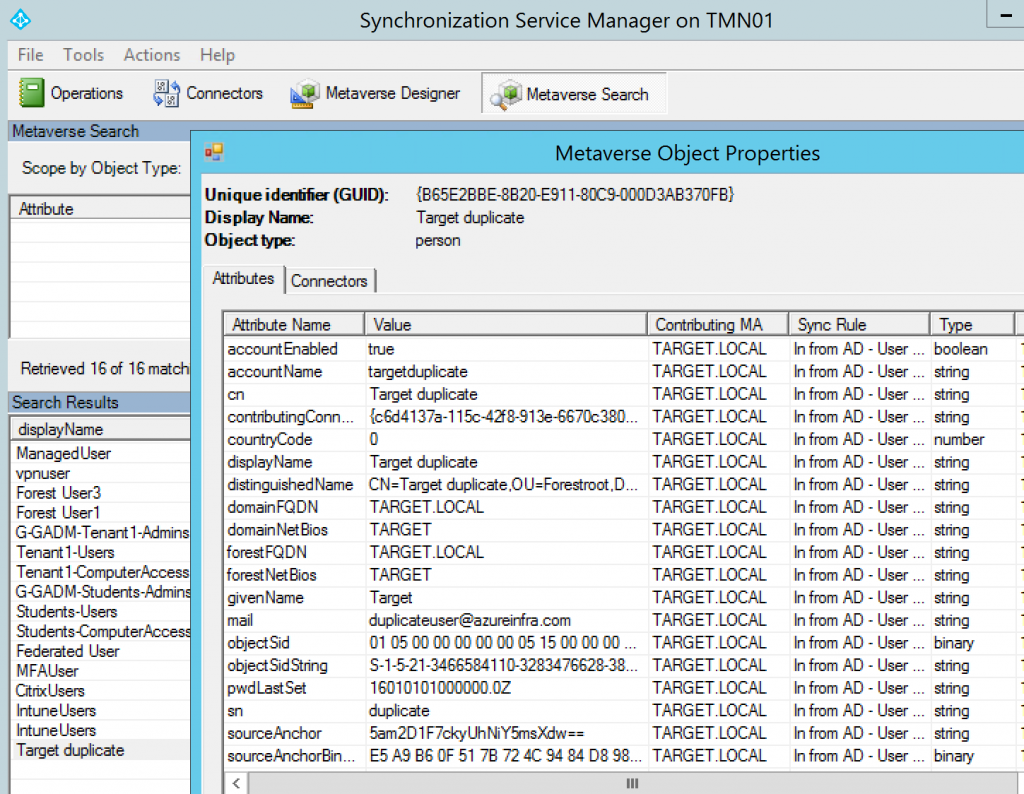
Find the user and double click to get its properties.
As you can see, the user was updated with the TARGET AD information. Remember, the FORESTROOT sAMAccount name was “duplicate user”.
So an important lesson now, the order of the rules in the AAD Sync Engine determines which AD is authoritative for objects and attributes. Given we want to move to the TARGET domain, I added that one first to AAD Connect, and then added the source domain.
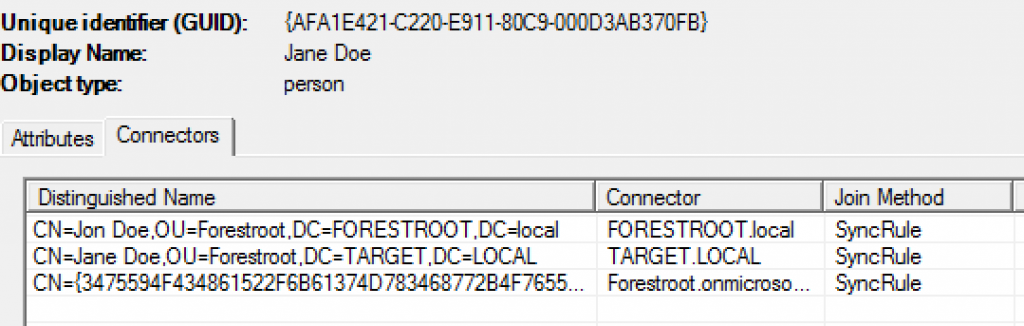
If on the window we select Connectors, you can actually see the three connectors this object is connected to:
Now let’s take a look at where this join is configured in the ruleset. For this, we open the rule editor, let’s take a look at the configuration: Go to C:\Program Files\Microsoft Azure AD Sync\UIShell and open SyncRulesEditor:
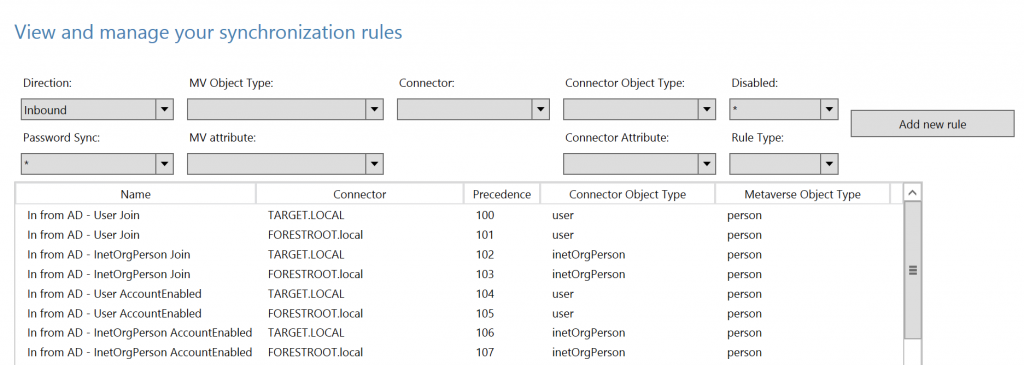
The SyncRulesEditor shows you all the rules that are applicable to AAD Connect. In MIIS you had to programmatically set the rules, but in AAD Connect it’s a bit easier. As you can see, the first two rules are the User Join rules. Click the first one and select Edit (a pop-up will show, click NO). Select Join Rules and you will see:

This means that if the source attribute (from TARGET AD: mail) is equal to an existing object in the metaverse with attribute mail, these objects are Joined together.
As you can see, the 2nd rule has the same settings as this applies to FORESTROOT. This means that when importing objects, they are not matched on AD-to-AD and then pushed into the metaverse, but they are AD->Metaverse and AD2->Metaverse.
Now let’s see what happens if we have a single object in FORESTROOT and after a while a new object is created in TARGET with the same mail attribute.
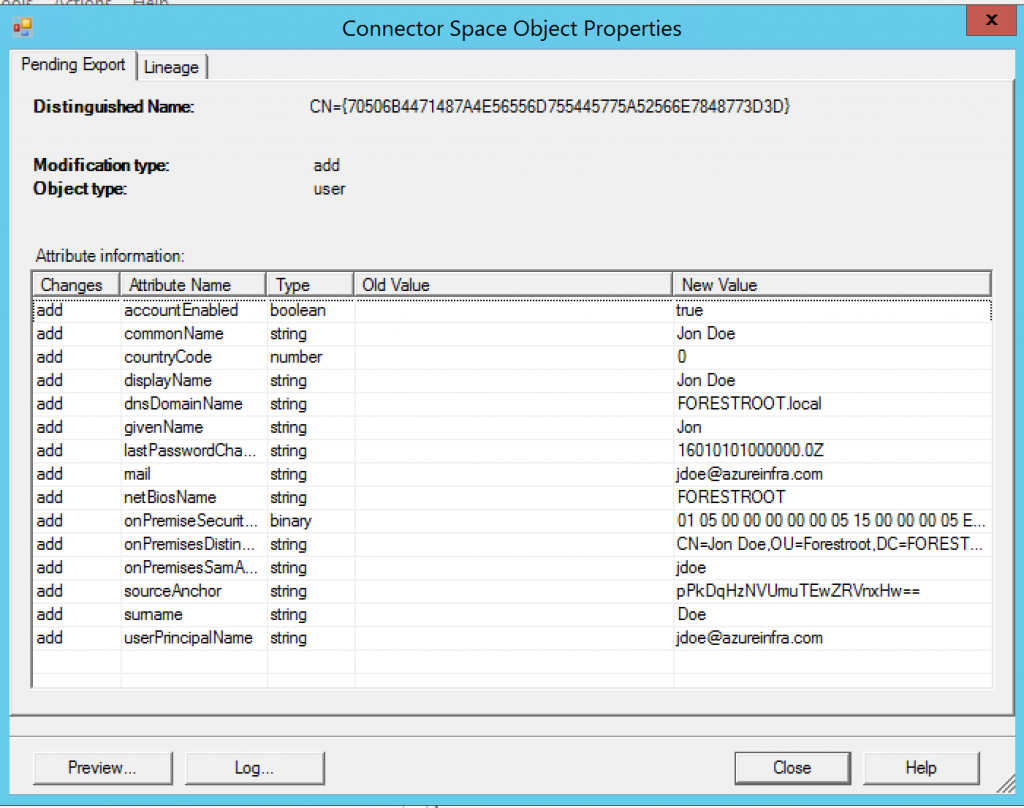
First, Jon Doe in FORESTROOT. It is added to the metaverse with a sourceAnchor of pPkD….. during a normal synchronization. We then created Jane Doe in TARGET and imported it as well. In this case I ran just the delta import from TARGET to show what is happening:
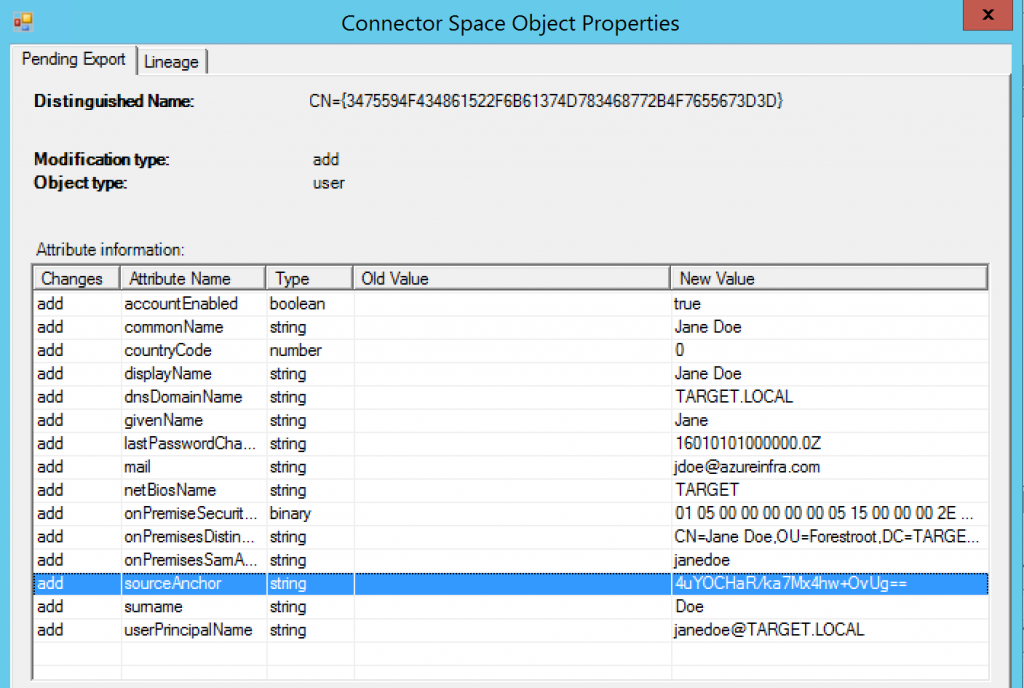
Next click the AAD Connector, select search Connector Space and set the scope to Pending Export. Click search. When you only have a few objects just click through the users to find the right one (in very large organizations, check the object in the MetaVerse first, grab the GUID for the right connector on the connectors tab, and search for that one in the pending export window).
The image above shows the export attributes (to AAD) for JaneDoe (which used to be Jon Doe), with a new sourceAnchor (4uYO….), but the two accounts are merged in the metaverse:
The change of the sourceAnchor attribute does not have to be that bad, but we will see in a later chapter how to avoid this from happening.
Summary:
When connecting AAD Connect to two or more forests, it will ask you if objects are unique within each forest, or if in the ruleset a join rule must be created. If you enable this option (which you should if you are doing AD Migrations) you should be aware that unwanted matches can occur. If running in complex environments, choose your attribute wisely. We’ve also seen that the first forest added to the configuration is leading. This means that the existing objects might be changed due to the objects (and their different values) in the first forest.