The Microsoft Surface Hub is a gigantic whiteboard on steroids. It allows you to .. (dhu) Whiteboard, but also allows you to join meetings through Skype or Teams, load PowerPoint/Word documents, connect you to your Office 365 services and much much more.
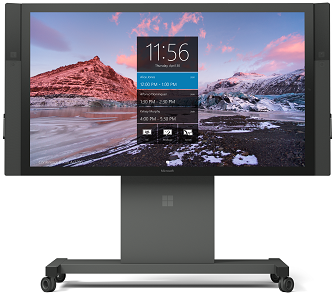
Now the device in itself is special already, with many Mic’s and Camera’s and the rechargeable pens on the side. What interested me though is the software that runs on it.
It runs a special version of Windows 10, that only allows certified applications from the Microsoft Store and a very different GUI that allows standard users to easily login, schedule meetings, join meetings and obviously start whiteboarding or presenting.
Note: This post is completely without any warranty of not bricking your device, the instructions given are for playing around, not for production usage.
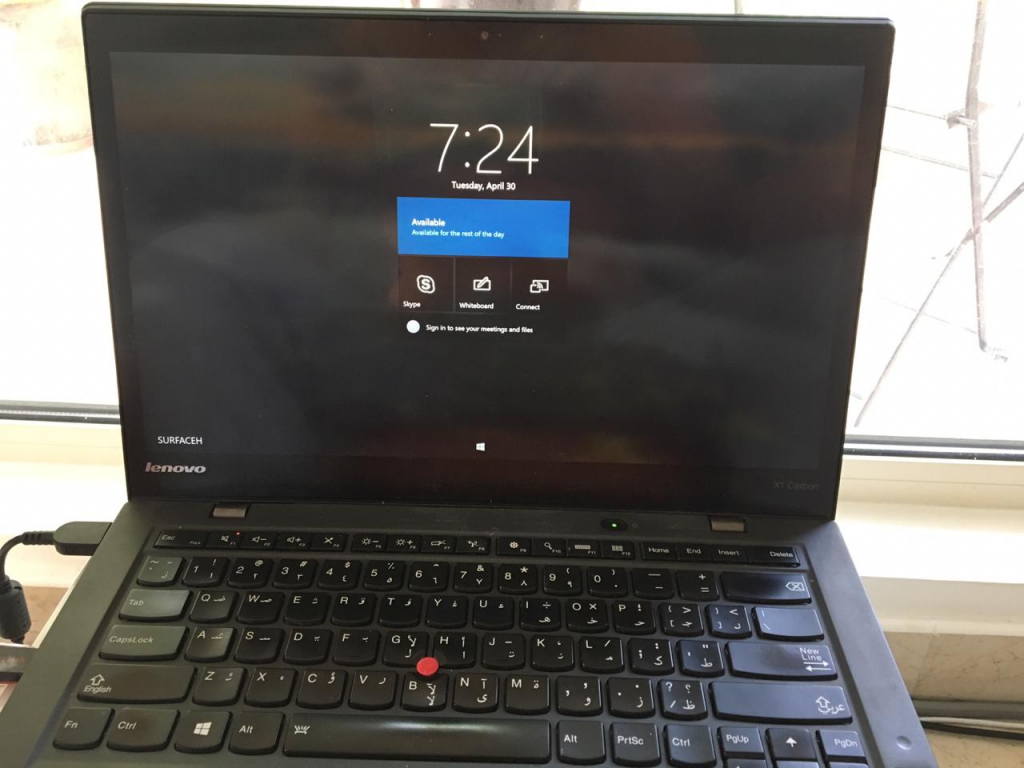
I’ve set myself the challenge of getting this OS to a portable device such as a laptop with touchscreen (the OS makes no sense without a touchscreen). Why? you ask.. for one, because we can, but I also thought it would be a great gadget to have in the house. My kids could setup a meeting with their grandparents, draw on it and for me in my home office, it would be a nice gadget to have on top of my normal screens so I can join meetings easily without ever deviating from my work..
While my Surface Pro was to be the destination, I thought I’d try it first on my old Lenovo X1. Ok, that one doesn’t have a pen (there goes whiteboarding), but it does have touch and is a good candidate to test this out.
So how to start, well as indicated the Windows 10 version is not the standard one, so we can’t just start with that one. Luckily there is a Surface Hub Recovery Tool. Which is normally used to re-image the SSD of the Surface. Given this application needs to run on a standard Windows 10 device, this was my chance.
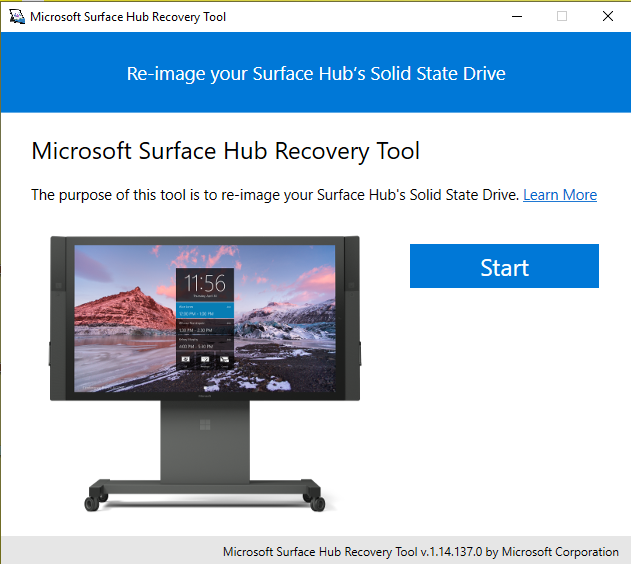
I ran the application and noticed it downloads a file of around 10Gb. That must be our Windows 10 image. And indeed, when we look at C:\Program Files\Microsoft Surface Hub Recovery Tool we find an install.wim file. I copied that file over to a temporary location, ran USBtoGO (which took forever).. and then booted the Lenovo with the USB stick. And indeed, Windows 10 Hub special edition was loaded (after around 3 hours or so). But during the initial setup I noticed there is no network connected. No Wifi, no Ethernet. Probably because the drivers in the image are only supporting the actual device’s hardware, not my Lenovo. So, back to the custom image and load it up with DISM to get the drivers in. What I did notice though (ALERT!) is that the wizard actually clears all other drives or at least screw up the boot sequence, so even if you use Windows 2 Go.. be careful.
I downloaded the drivers required (Wifi, Network, Camera) extracted the .exe files and got working in DISM, where the first task is to mount the image, then apply the drivers (scanning all folders beneath a folder) and finally closing the image:
Dism /Mount-Image /ImageFile:C:\shub\install.wim /MountDir:C:\test\offline /index:1
Dism /Image:C:\test\offline /Add-Driver /Driver:C:\drivers /recurse /ForceUnsigned
Dism /Unmount-Image /MountDir:C:\test\offline /Commit
Next I put it up again on my USBtoGo and ran through the initial wizards which takes hours to complete.. (USB is not as fast as the internal SSD I guess..).
Next options are to distribute the WIM file through a PXE boot or otherwise straight onto the internal SSD. For this I used my Azure Stack Kit installer for USB post. The easiest way to distribute is to put the file on a fileshare and then using my WinPE Deployment scripts, create an environment with network support from which I could load the WIM file straight onto my SSD.
To create WinPE ISO (or USB, check my Azure Stack Kit Installer, but replace the initial build command with CreateWinPEDeploymentISO.ps1)
So I booted from the USB and killed the script at the point where it wanted to clean my drives.
Then in WinPE, cleaned the SSD itself using diskpart and create a 100Mb primary partition, activate it and format it and give it a drive letter. Next created the big windows partition, format it and give it a drive letter.
select disk <>
clean
create partition primary size=100
format quick fs=ntfs label="System"
assign letter="S"
active
create partition primary
format quick fs=ntfs label="Windows"
assign letter="W"
Next, using the Network connection created by the Azure Stack script, apply the WIM file and copy the boot files
dism /Apply-Image /ImageFile:Z:\Shub\install.wim /Index:1 /ApplyDir:W:\
W:\Windows\System32\bcdboot W:\Windows /s S:
Voila.. reboot and it should be working! (except for me the camera does not (yet) work.. but we’ll get to that once I find the device I actually want to use for this 🙂