In earlier posts I talked about using F5 as a reverse proxy to Kerberos based resources using Azure AD authentication. This post takes it a step further. Creating an SSL VPN based on Azure AD identities with Conditional Access (if needed).
So, the architecture:
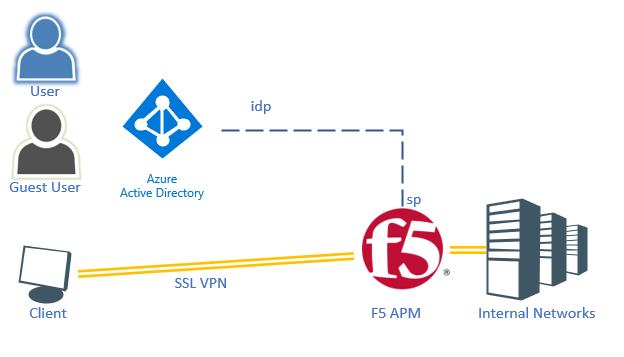
As you might have seen, there is no Active directory in play here, as such this setup works also for Azure AD only accounts as well as Azure AD Guests.
F5 VPN application
The F5 APM module allows administrators to configure an SSL based VPN entry point in their Webtop portal. This webtop portal can list regular web applications along side the VPN, so this tutorial also works for that. The idea here is that access to the Webtop portal, as well as the embedded VPN solution in there is based on a trusted token from Azure AD.
Azure AD configuration
For users to be able to authenticate to the webtop portal they need to have an application assigned to them in Azure AD. Given F5 is now available in the marketplace, this can be easily achieved:
- In Azure AD, go to Enterprise Applications, click Add Application, and search for F5. Give the application a recognizable name
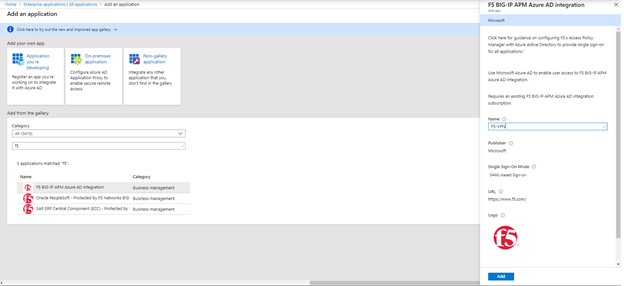
- And click Add to add the application. This will take a minute.
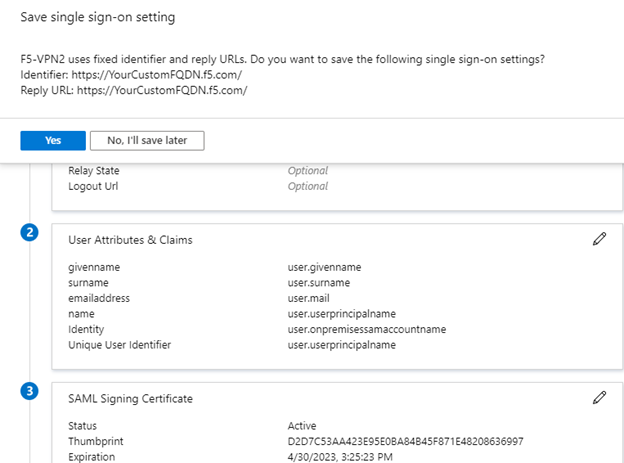
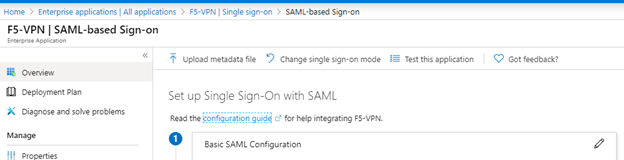
- Next, click Single Sign-On, choose SAML and in the pop-up select No, I’ll save later
- Under the SAML Signinig Certificate block, choose Download on the Federation Metadata XML
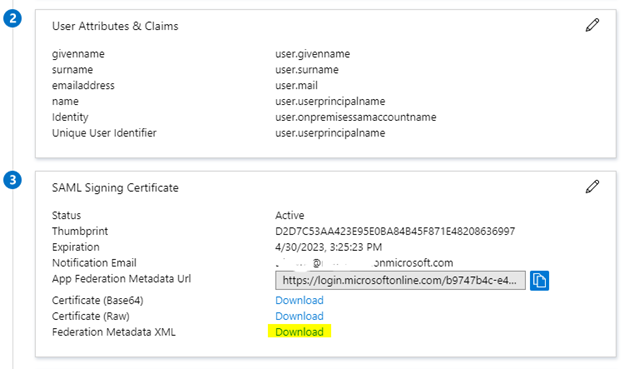
- Save the file as we will need to import it into the F5 device.
- Click Users/Groups and add your users who need access to this service
F5 Setup
To setup the F5 device there are a few steps that are required. I’m assuming here you have APM running already with an internal/external/management IP.
- Import a PFX file to run the web portal on (and to be used as the VPN address)
- Configure the portal + VPN
- Configure Federation services
- Configure Access Policy
Setting up the certificates
If you have a PFX file you need to add it to the F5 device by
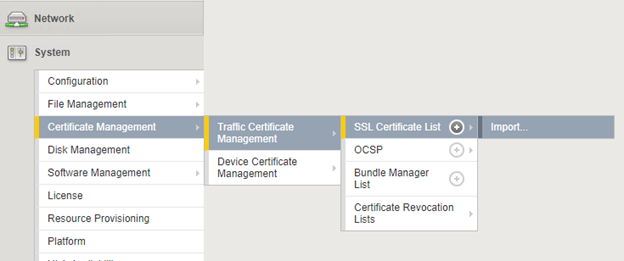
- going to Certificate Management, Traffic Certificate Management, SSL Certificate List, Import:
- set the import type to PKCS12, browse to the PFX file and provide the password for it.
Next, the certificate needs to be added to a client SSL profile, create a new profile using:
- Go to Local Traffic, Profiles, SSL,
Client and click +
- Give the profile a name (for example vpn.contoso.com)
- Leave the parent to client
- Under basic select the Custom checkbox
- Click Add under the Certificate Key Chain and add your previously imported certificate
- Click Finish
Configuring F5 external IDP and SP
For F5 to connect to Azure AD, we will need to add an external IDP provider. For this,
- Go to Access, Federation, SAML Service Provider, External IdP Connectors and click down arrow to select Create From Metadata
- In the pop-up click Browse and select the earlier downloaded XML file (from AAD) and type the name for the IDP connector (for example the same name as the application you created appended with AAD [AAD-F5-VPN]). Leave the certificate field default and click OK
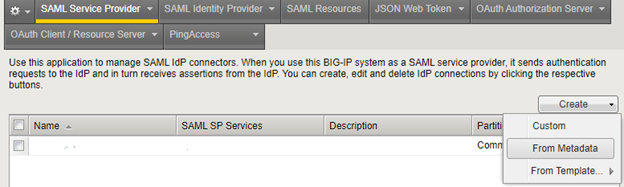
- Go to Access, Federation, SAML Service Provider, Local SP Services and click Create
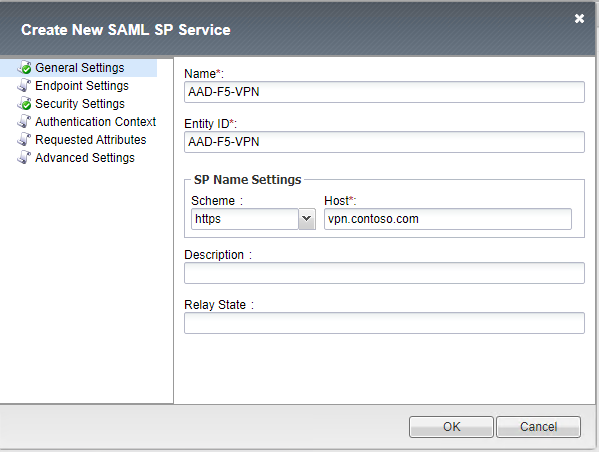
- In the pop-up provide:
- The name for the SAML SP service
- Use the same name for the Entity ID
- On the SP Name settings, set it to https and set the host to match your certificate, such as vpn.contoso.com
- Click OK to close
Then we need to bind the External IDP with the SP we created. We do this by
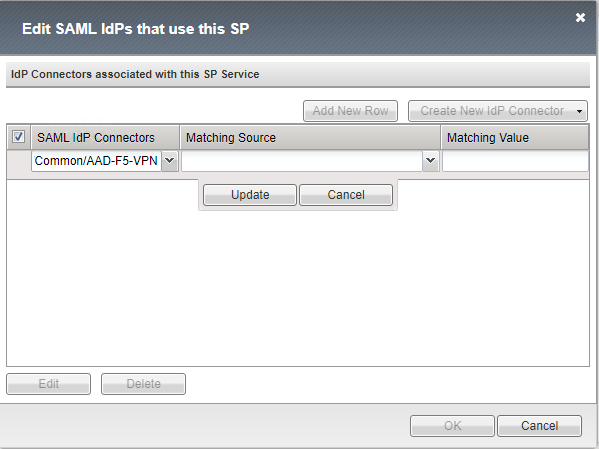
- selecting the newly created SP service and then clicking the Bind/Unbind IdP Connectors on the same page.
- In the pop-up select Add New Row
- Under SAML IdP Connectors, select the Common/AAD-F5-VPN idp leave the rest of the fields and click Update and then OK to close
Lastly, we need to export this SP configuration and re-import it into Azure AD. For this:
- On Access, Federation, SAML Service Provider, Local SP Services, select your SP service and select Export on the bottom of the page.
- Save the file
- Go back to Azure AD and select the earlier created F5 application and select Single-Sign On
- Select Upload metadata file and provide the downloaded XML file from the F5 appliance.
- Click Save
As said, the webtop is nothing more than a web portal that allows you to publish web applications including the VPN. To publish the webtop:
- Go to Access, Webtops, Webtop Lists and click Create
- Give the portal a name (contoso_webtop), set the type to Full and keep everything else as defaults
Configuring the VPN
For the VPN to work we need to configure a few items. First of all, we need to have an IP pool that we assign to our clients that want to create the VPN, so they clients receive an IP from this pool. For this
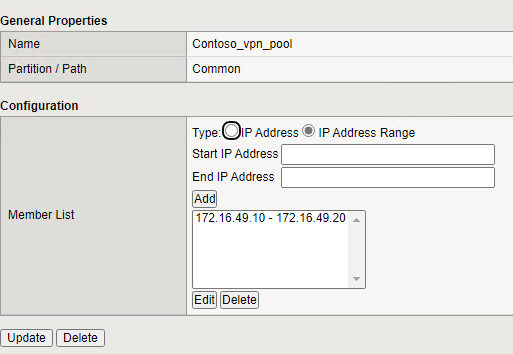
- Go to Access, Connectivity / VPN, Network Access (VPN), IPV4 Lease Pools and click Create
- Give the pool a name (such as Contoso_vpn_pool), set the type to IP Address Range and set the start and end IP range. Click Add and click Finish
Second, we need to create the Network Access List. Or in other terms, the object that will contain our IP settings (from our pool) our DNS settings, VPN permissions (where can my users go to) and applications that can be launched with my VPN (not required here).
- Go to Access, Connectivity / VPN, Network Access (VPN), Network Access Lists and click Create
- Give the VPN network access list a name (Contoso-VPN) and set a caption name (Contoso-VPN)
- Click Finished
The object will be created and opened after creation to provide more information
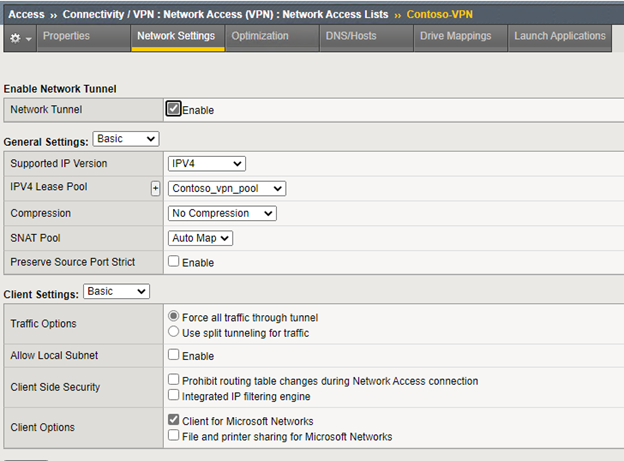
- Go to Network Settings in the top and select
- supported IP version: IPV4
- IPV4 Lease Pool: Contoso_vpn_pool
- Under client settings, select Force all traffic through tunnel or Use split tunneling for traffic (more on that later – for easy implementation keep the Force all)
- Go to the DNS/Hosts Tab and set
- IPV4 Primary Name Server: IP of your internal DNS
- DNS Default Domain Suffix : DNS Domain Name of Internal Suffix (optional)
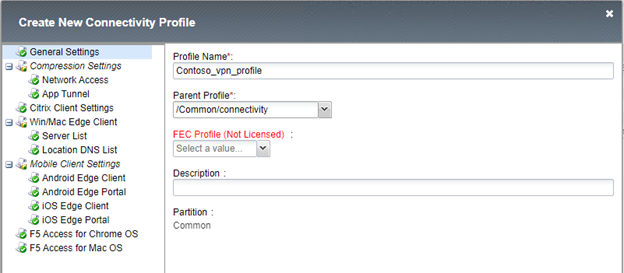
Next we need to create a VPN Connection profile which lists the settings for each of the various clients that can use the VPN tunnel (such as Windows, OSX, Android..etc)
- Go to Access, Connectivity / VPN, Connectivity, Profiles and click Add
- Give the profile a name and set the parent profile to /Common/connectivity
F5 Access Profile
Now that the VPN itself is ready we need to create an access policy for it. What is required to Allow or deny access. For this,
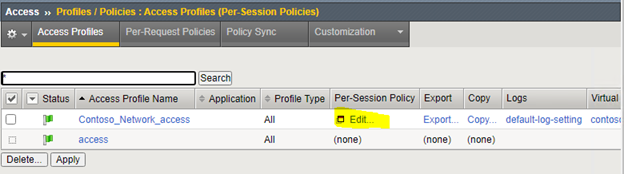
- Go to Access, Profiles / Policies, Access Profiles (Per-Session Policies) and click Create
- Give the profile a name (Contoso_network_access) and for the profile type select All
- Add English to the list of supported languages (and any other you want) and click Finish
- Once the profile is added, it will be listed, and you are allowed to click Edit for the Per Session Policy
- In the new tab that will be opened we will need to create a new access policy. For this, click the + sign to add a new item.
- In the pop-up select Authentication and select SAML Auth
- In the configuration for the SAML auth, select your earlier created IDP and click OK
- Click + under the Successful outcome of the SAML authentication
- In the pop-up select the Assignment tab
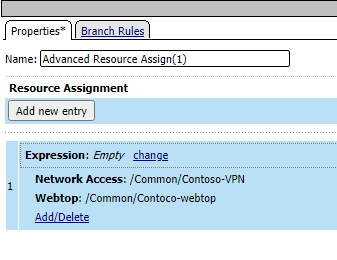
- Select Advanced Resource Assign and click Add Item
- In the pop-up select New Entry and then Add/Delete
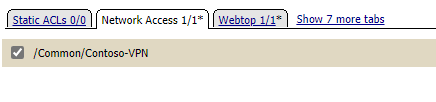
- In the next window, select Network Access and select the VPN profile created earlier
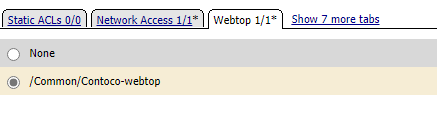
- Select the Webtop tab and add the webtop created earlier
- Click Update
- And click save
- Change the outcome of the assignment to Allow
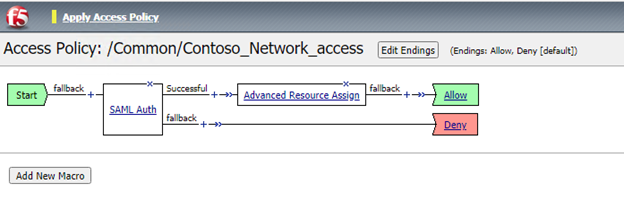
- Select Apply Access Policy
Publishing the webtop
In order to publish the webtop, we need to create a virtual server. For this,
- Select Local Traffic, Virtual Servers, Virtual Server List and click Create
- Give the new virtual server a name (contoso_vpn_listener) and set the type to Standard.
- Provide an IP address for the virtual server (your external IP or FW forwarded IP for TCP:443)
- Set the service port to 443 HTTPS
- Set the state to Enabled
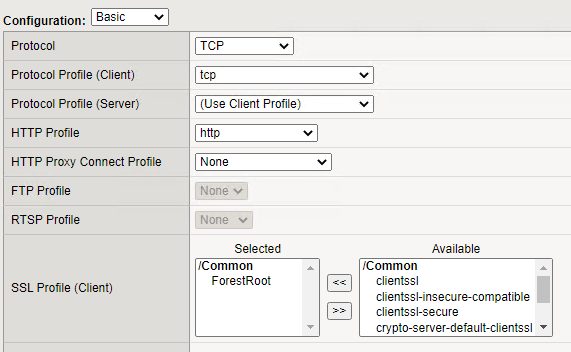
- Under configuration
- Set the protocol to TCP
- Set thehttp profileto http
- Under SSL Profile (Client) add your custom client profile (created with the certificate)
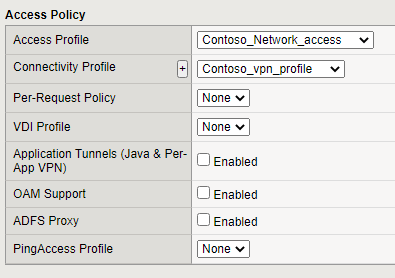
- Under Access Profile
- Set the access profile to your Network_Access Profile (contoso_network_profile)
- Set the Connectivity Profile to your connection profile (contoso_vpn_profile)
- Click Finished
This concludes the configuration of the F5 device and AAD. This means it’s time for testing!
Testing
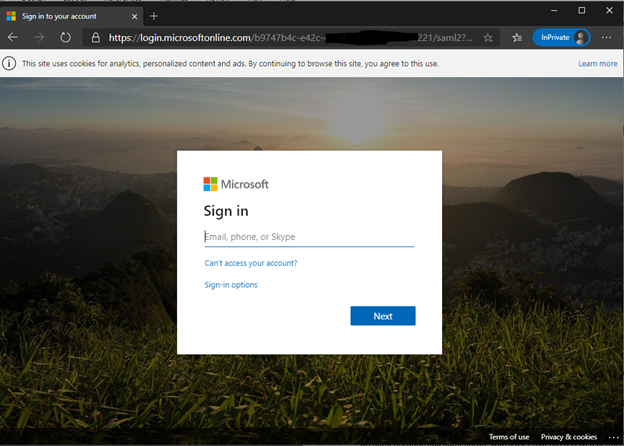
On a remote client make sure you can reach the https endpoint of the F5 through hosts file or DNS entry (recommended) and make sure you trust the certificate that was used in the SSL Client Profile. If you are using a public certificate that should not be a problem. Launch a browser and browse to the url of the application using HTTPS. You will be prompted for Azure AD authentication and authenticate with a user that has received permissions to this application.
After authenticating (with or without conditional access) you will see the webtop portal including the VPN object:
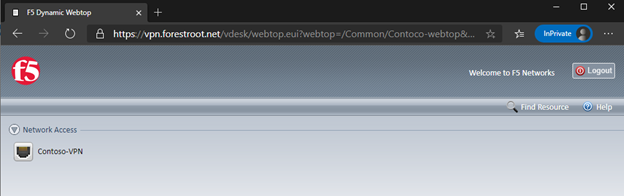
Click on the Contoso-VPN object and it will load the VPN for you.
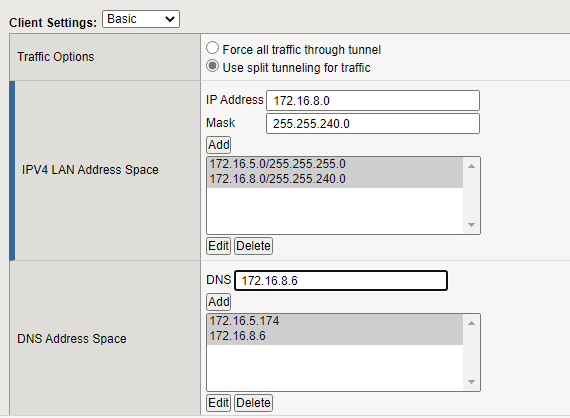
Network Access – Split Tunnel
In this tutorial we have set the VPN tunnel to Force Tunneling. Meaning all traffic will go through the VPN. This is not always desired as this might cause the local client to loose internet connectivity or simply add additional latency which is undesired when using on-line meetings.
When switching the Network_Profile to split-tunneling, it allows the F5 administrator to determine the routes that need to be published to the clients. Including DNS servers (apart from the earlier mentioned DNS servers).
The VPN tunnel in F5 uses SNAT by default. This means that backend servers will see any inbound packet coming from the F5 device. If you want to disable this and switch to full route mode the following changes need to be made:
- On the Network Settings tab of your Network Access Lists, change the SNAT mode to none
- make sure your central routers have a valid route back to the F5 devices (internal IP) for the IP Pool range handed out to clients
- save and apply the policy and reconnect your clients

Conclusion
It is possible to provide VPN access with MFA and SSO capabilities on an F5 appliance with an APM module using Azure Active Directory
Happy VPN’ing!