In all our previous posts we had the user sign-up flow take control of the actual creation of the user in Azure AD. The problem with that flow is that if we want to add the user to a group or perform other functions on it (like adding additional attributes) we would have to reply with a 200 Continue from the API, start a timer and hope the user is created (and replicated) by the time we start our functions in the Logic App in the background.
Sometimes its therefore better to have Logic App create the user for us. This allows us to have more granular control over when and how a (guest) user is created in our Azure AD. And will make available advance workflows such as business approvals, and as Logic Apps can be connected to Office 365 we can send these business approvals easily via email as we will see in this post.
A Logic App approval workflow
So, let’s dive into the most advanced workflow I could come up with in the short time I’m writing this blogpost. In short, we will try to retrieve the details including partnerID into the API, then send an approval email via Office 365 and upon approval create the guest user (from the API) – add it to a group (that allows access to the application) and send out a welcome email to the user.

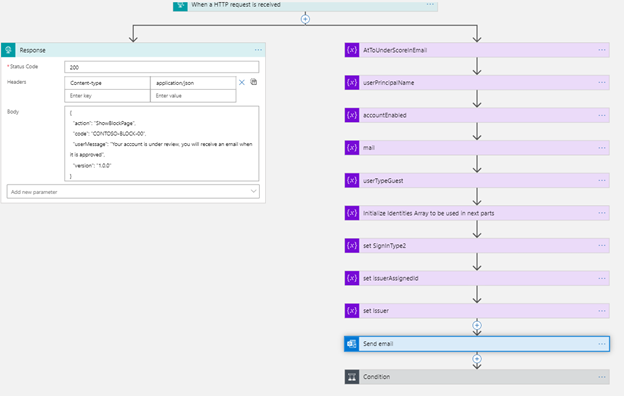
Using our earlier created Logic App (I’ve removed the partner ID verification and just kept the “When a HTTP request is received”) I’ve added a new object: Office 365 approval email, but prior to that I added a lot of variables. These are used in the logic to come.
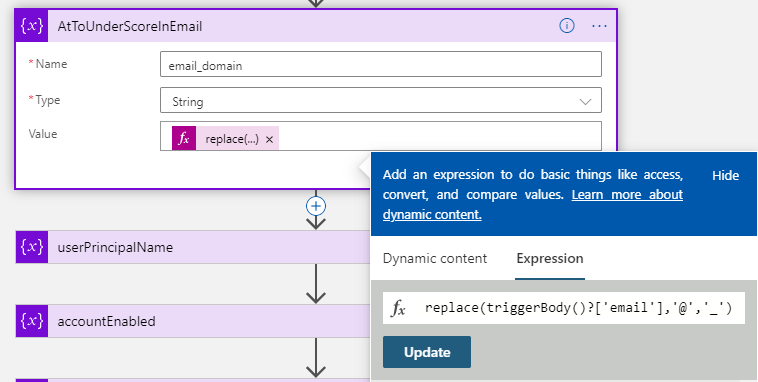
First, the inbound email address user@domain.com needs to be converted into user_domain.com#EXT#@youdaaddomain.onmicrosoft.com which we will need to set as the UPN of the guest user.
For this I use the following expression to create the email_domain variable
replace(triggerBody()?['email'],'@','_')
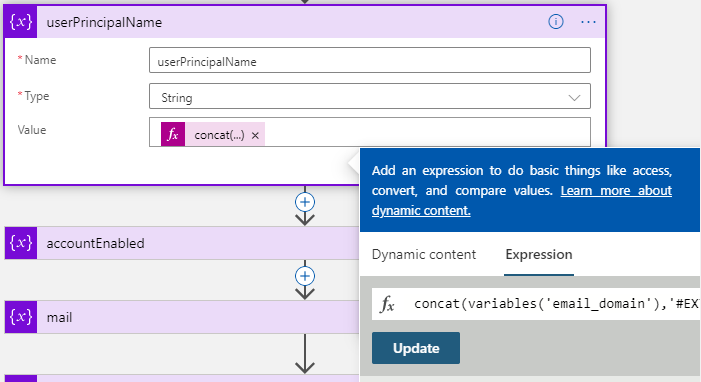
Next is to add the #EXT# part and build a full userPrincipalName variable in the next variable we add:
concat(variables('email_domain'),'#EXT#','@','contoso920.onmicrosoft.com')
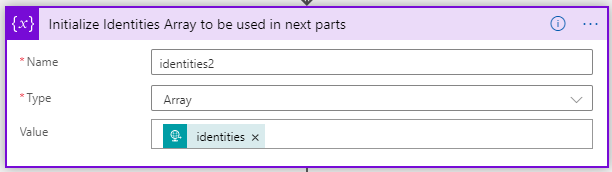
As parts of the inbound JSON template are stored in an Array. As we want to extract information from that array [0], I created a new Identities2 variable of type array and filled it with the Identities from the JSON body from the HTTP block.
And next is creating a few variables which we will need later-on, you can create 3 new variables similar to the variables mentioned above with the following Expressions.
Name - Type - Expression
signInType0 – String - variables('identities2')[0].signInType
issuerAssignedId2 – String - variables('identities2')[0].issuerAssignedId
issuer2 – String - variables('identities2')[0].issuer
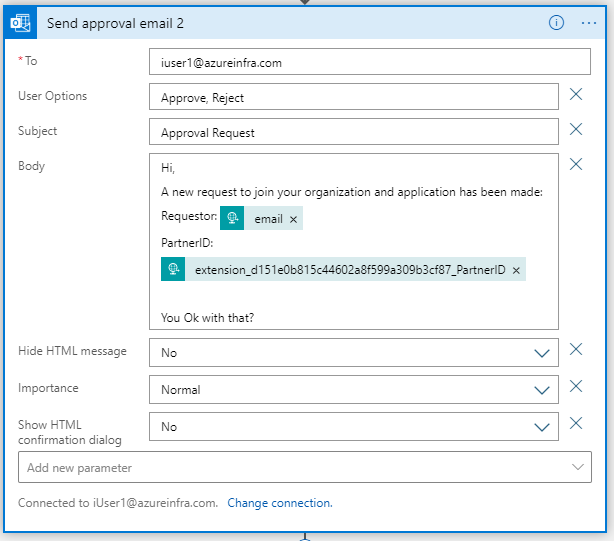
Outlook Approval Emails
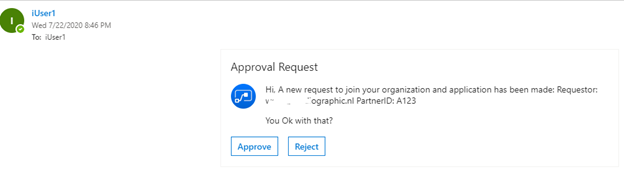
So next is the send approval email part. In here we will send the attributes received (and we could add the just created variables as well – for example to indicate the sign-up was initiated by Facebook).
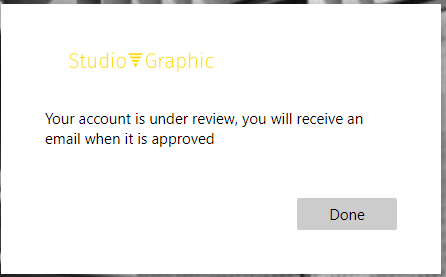
Now, the Logic App will wait for approval and until that time, the requesting user is stuck on the sign-up page not knowing what is happening in the background. As the approval might take a while, we probably just want to tell the user that his account is under review and after approval they will receive an email. In order to do that, we will issue a 200:ShowBlock page with a custom message to the sign-in user.
In our Logic App that means we need to create a parallel track, which we do by clicking the + sign between the HTTP request and O365 object and selecting Add a parallel branch.
Creating the new guest account
Which brings us to, what happens when the receiver of the email (in the TO: field) accepts or rejects the request. For this we put in a condition; Selection option from Outlook is equal to Approve and from there we have two outputs.
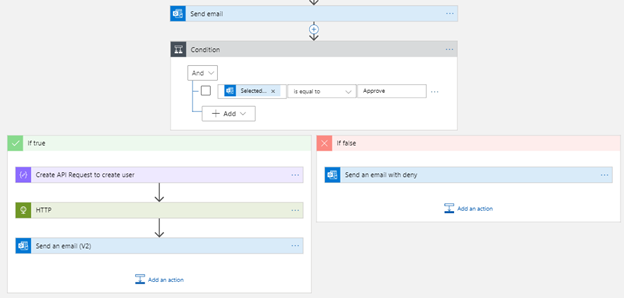
The if false sends an email to the requestor with a deny message. The if true we create a JSON payload that we then send to the GraphAPI. We do this by adding the compose object and then add the following input:
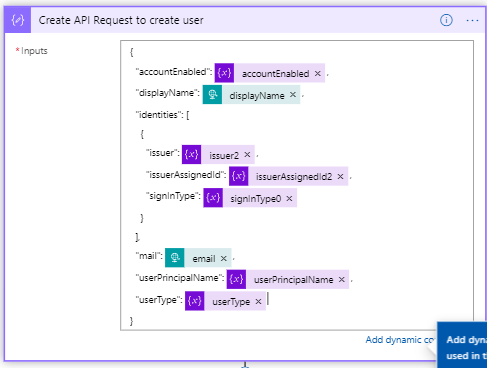
To then actually create the user through an HTTP PUT action. For this add the HTTP object and fill in all the fields:
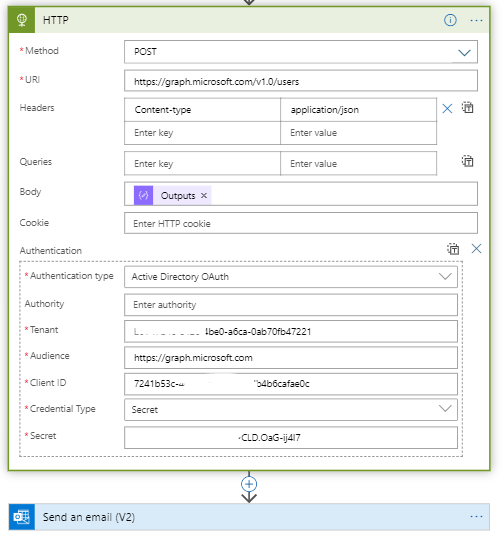
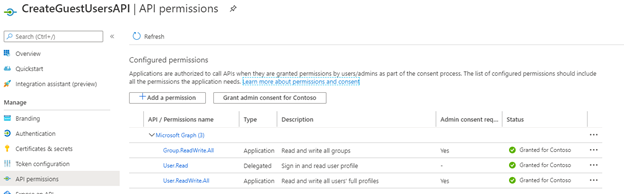
The fields for ClientID and Secret are the ones from an Azure AD App registration that has access to the GraphAPI and write access to create users and manage groups.
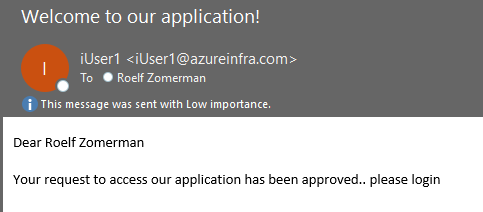
Finally, we send a message to the user indicating they can login to the application. Obviously, we could add additional steps to add the user to a group, but in my case I created a dynamic group to add all “Guest” members.
Conclusion
We can use Logic Apps for advanced scenario’s including business approvals prior to partners signing up to our Azure AD. You can make it as complex as your business workflow requires or as easy as you want. External Identities with it’s external API call capability provides a rich identity platform.. now if only they add it to the sign-in part of Azure AD as well…..