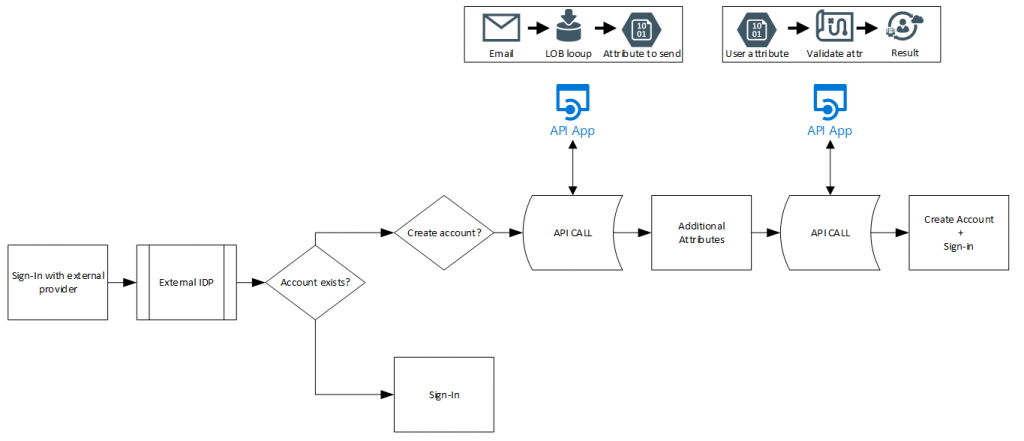
In the previous two posts I explained how to connect External Identities to a Logic App. This allows us to define advanced workflows for signing up external users. The power of Logic Apps is virtually unlimited and the built-in connectors can help us with lots of things. I created a logic app that adds the user to a group. But this requires the Logic App to respond with a 200 OK to the sign-up process to actually create the account, then after a few seconds to query AD for the username and then the group and finally add the user to a group.
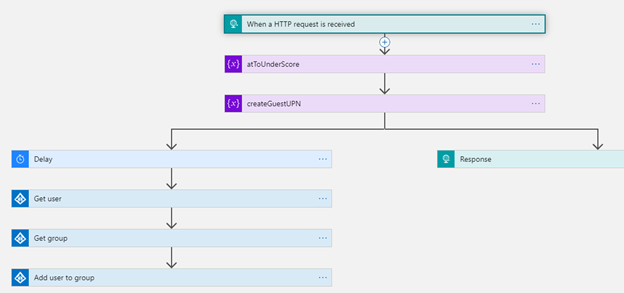
The thing to remember when working with the API’s is that it can be called right after signing in with IdP, or after populating additional attributes, but not after creating the account. That means any logic that requires the account to be created already needs to happen after we provide a 200OK response back to the service and the account is provisioned already. In the logic above, I provide the 200OK response already for the service to provision the user and at the same time issue a delay prior to getting the userID and groupID and then adding the user to the group. Other options in this scenario could be to notify someone of a new user being added to the system, but lets go into probably the most used one. Validating attributes. As we can provide attributes in the API call we can validate these. For example, my vendor provides a “partnerID” which we then validate against a database.
Custom attributes
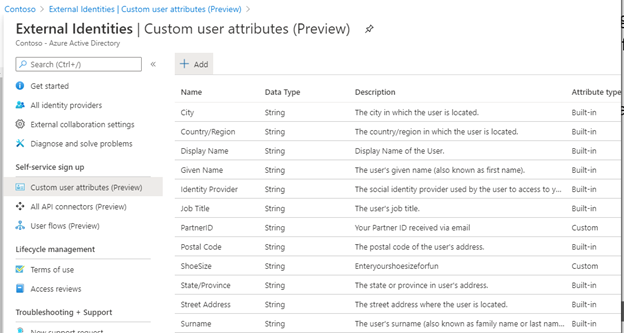
Custom attributes can be added to the External Identities configuration. Attributes can be filled by the signing-up user or automatically filled by the API or a combination of both. Adding and configuring these is easy through the External Identities page and each attribute added is of a specific type: String, Boolean or Integer.
So in the External Identities page, select Custom User Attributes and click + Add and create a String type PartnerID attribute.
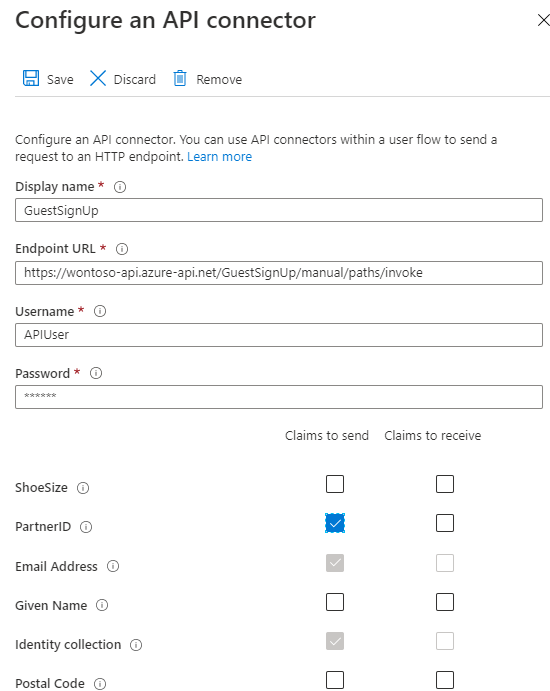
The attributes themselves are now available in the entire External Identities configuration, but per API we can decide if the API can handle that custom attribute and per user flow we decide if that attribute must/will be used. As we want to send the PartnerID to the Logic App, we first need to enable it in the configured API connection. Select All API Connectors and select the APIM/Logic App connector and select the ParterID in the claims to send option:
These attributes are stored in a separate application in the AAD tenant and they will be send in that specific application format. Let’s take a look at the application first:
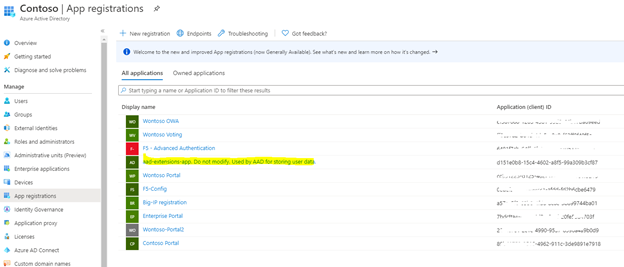
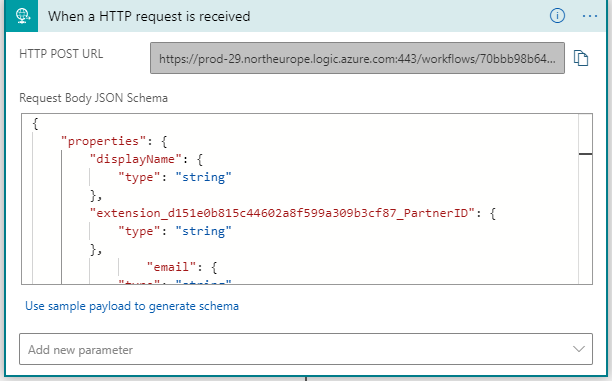
Under the app registrations of our Azure AD, you will find the “aad-extensions-app”. This app is automatically added as custom attributes configured and should not be modified or deleted. When receiving the attribute in our API, it will look like extension_<appID without ->_customAttribute, in my case it looks like extension_d151e0b815c44602a8f599a309b3cf87_PartnerID
By altering the “When a HTTP request is received” JSON schema we can now use the inbound partnerID in a query to for example an SQL server for validation. Based on that query result we give back a 200 OK to continue to create the account, or a 400 Validation Error to allow the user to change the value or a 200 Block to deny the user altogether. In the JSON schema, add the extension attribute and the type of value that is configured in External Identities:
Now we need to configure the custom attribute “partnerID” in the user flow. For this, open the user flows in the External Identities and select the user flow configured for that API/Application. Select custom attributes and select partnerID. In the picture below we now have Display Name and PartnerID selected.

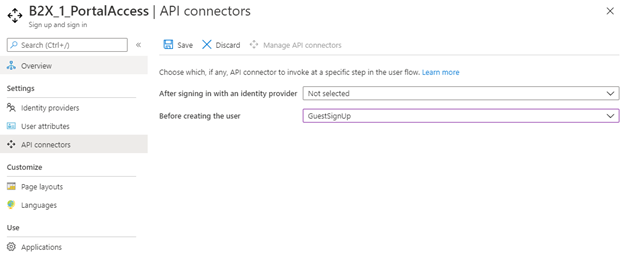
Under API connector here, I have the API connector configured under prior to creating the account, and in the All API connections the PartnerID is configured as a claim to be send.
Sending Custom Attributes
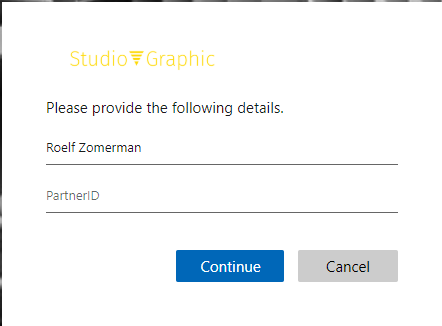
When a user signs-up now, prior to creating the account, the system will ask for the Display Name (already prepopulated with the Facebook displayName attribute) and a partnerID. As per the flow layout we can configure the attribute to be mandatory, editable and if the user can provide a free field or text box or Boolean.
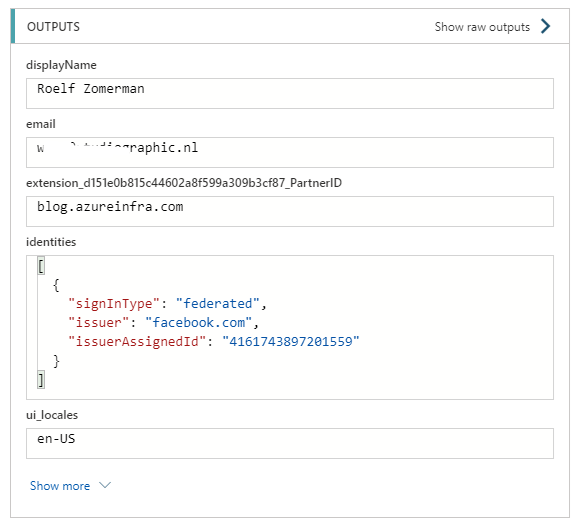
Providing a partner ID and clicking continue will trigger the API call and in the API results we can see the value of this attribute:
Returning Attribute values
It is also possible to return certain values to the requesting service. Based on the inbound email address or identity provider (on 1st API call) or user fillable fields (2nd API call)
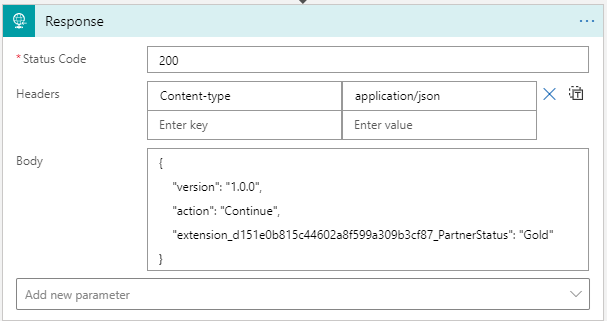
In order for the API to return a call, we need to provide an HTTP response. This can be added to the Logic App easily. Press + Next step and search for Response. But before we do that, lets make a decision easily in the logic app. I will look for PartnerID “A123” and if that is valid return a 200 OK, if not a 200 Block. In the Logic App add a new step and search for condition and select Control -> Condition. For the attribute select the extension_appid_partnerID in the dynamic content box set the statement to “is equal to” and type A123 as the value. There will be 2 paths now, one is “If True” and one is “If False”. In the If true, select Add and search for response. For the Headers section, Type Content-Type and as its value application/json and type the JSON body shown below. Perform the same for the If false side of the Logic App. And save the Logic App.
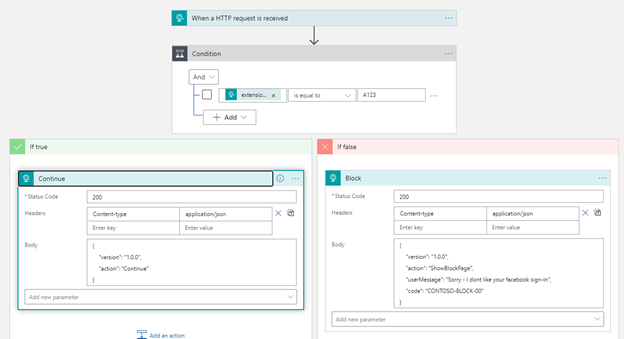
The status code can be either 200 or 400. If you are ok with the External Identity flow to create the account, reply with a 200. Not specifying anything else will just push a continue to the flow although officially you should specify a JSON body with the “action”:”Continue” attribute.
It is possible to inject additional attributes as well as we will see later-on. If you don’t want to create the account and stop the flow you need to provide a 200 with a JSON body indicating “action”:”ShowBlockPage”.
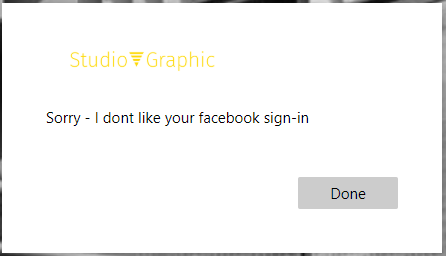
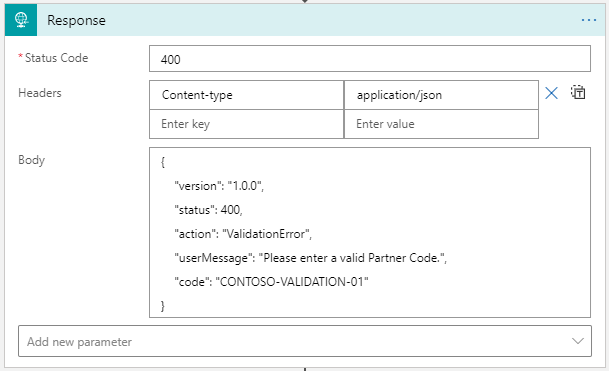
In the 200 block page response you can also include a user message and a specific code on why the API denied the creation of the account. If the values supplied by the user weren’t validated, you can request the user to correct them. For this we need to send a status 400 with the JSON body and a description on what is wrong:
If we wish to return certain attributes and new values we can do that as well by sending the attribute in the JSON body of the Response, simply stated:
But if the Body value is not static, but needs to be filled, we need to create the body in the Logic App based on previously created or looked up values. We do this with the “composer” component which we will see in action in a later post.
Conclusion
You can work easily with Logic Apps and External Identities in exchanging and creating custom attributes. These attributes can help in deciding if a user requires access yes or no. But be aware that these API calls are only made when creating a new user not during regular sign-in. Once the user is created in your Azure AD tenant as a guest, any API call is bypassed and a regular sign-in happens.