In this post we will build our own image to be used with WVD. Apart from using the Deploy Microsoft 365 Apps by using Remote Desktop Services guide to install Office 365, we will also install Teams (optimized for WVD), Visual Studio Code, set some preferences and copy those to the default profile before optimizing the entire image for WVD and putting it in the Shared Image Gallery. Given how long this might get.. I will break it up into multiple posts
Deploying the master VM
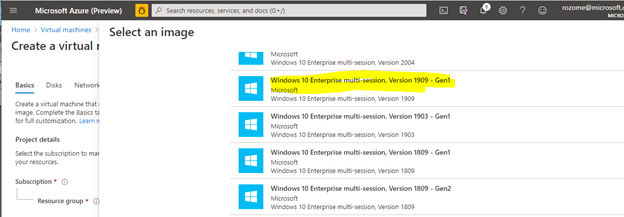
So we start with a Windows 10 Enterprise MultiSession Generation 1 VM. This is a standalone Windows 10 VM without any Office product already installed on it, so we got the cleanest possible VM for us to build our image on.
Go to Virtual Machines, click + Add, select the subscription and resource group you want this master image to be created in (we will destroy this VM later – but keep the disk image) and give it a name and a location to be hosted in.
For the Image, select Browse all public and private images and search for Windows 10 to then select the Windows 10 Enterprise multi-session, Version xxxx – Gen x.
Continue the wizard and connect the VM to the network you want it to, give it tags etc etc.. and provision the VM.
The first thing we will need to do is join the VM to the domain, so at least we can control some aspects of the VM. While it is optional I would recommend it, as it would also allow us to control user groups, install and test software that is domain specific. In order to avoid most of the group policies I created a new OU to put the computer object into so that only the domain policies apply. In order to join a domain you can use the graphical method and then move the computer object to the right OU, or you can do this via PowerShell:
Add-Computer -DomainName forestroot.local -OUPath "OU=MasterImages,DC=FORESTROOT,DC=local"And then reboot the computer to make the changes active.
Now we should have an “empty” Windows 10 VM ready for application deployment, and we want to make sure we login to the VM using an (local) administrative credential. To allow for this, login to the VM as local admin add a domain user to the local administrative group and login with that user. The reason I don’t want to use a domain admin user is that we will be browsing the web for some software which you should not be doing as domain admin or a shared admin account that has full privileges on all your computers.
Open up computer management, go to local users and groups, groups, administrators, click add and type the name of the user you want to add. In the pop-up provide a username and password for the domain (to query users, no need for admin permissions here) and add the user. Then logoff and logon as that user.
Browsers
So, let’s start with the first task at hand, making sure we can browse normally. There are multiple browsers available such as Chrome, Edge Chromium, Firefox etc. When installing make sure to use the machine based installers, not the user based installers. The machine-based ones are better for multi-user deployments and don’t have a lot of overhead in the profile of the default user, which speeds up the login process for users logging in for the first time.
I downloaded Chrome on another computer and copied it into the master VM on C:\Installers and ran the installer as Administrator. The installation itself runs completely by itself and then it opens the initial browser configuration. Click on Get Started and then set it up to how you want the browser to act for all users (note that you can also have this configured by Group Policies, in that case click Skip on all pages), but make sure to not sign-in.
For Microsoft Edge Chromium you can download the enterprise-wide installer from https://www.microsoft.com/en-us/edge/business/download. Select the right build and platform (x64) and download the installer. I again did this on my own computer and copied the installer to c:\installers of the master image. Again, run the installer and this time there won’t be a first run so you are done.
Group Policies for Browsers
When configuring the master image for users we also want to make sure we don’t bug the users with the initial setup and questions (at least that’s my idea). Group Policies allows us to control the browser behavior and hide initial wizards and questions and just start the browser the way (alert) I think my users want. For Edge Chromium you can download the group policy preferences from the same Microsoft page and for Chrome you can download them from https://support.google.com/chrome/a/answer/187202?hl=en. Both include options to set startup pages, search engines etc.
To hide the Edge Chromium startup wizard, run the following command to download a script from github and run this script. It will create a near empty json file with almost 0 preferences.
PS C:\installers> Invoke-WebRequest -UseBasicParsing -Uri 'https://raw.githubusercontent.com/gunnarhaslinger/Microsoft-Edge-based-on-Chromium-Scripts/master/EdgeChromium-FirstRunExperience.ps1' -OutFile EdgeChromium-FirstRunExperience.ps1
Then set the execution policy and run the script
Set-ExecutionPolicy Unrestricted
.\EdgeChromium-FirstRunExperience.ps1
For Chrome to hide the first launch, make sure to set a home page (for example about:blank) through GPO’s and you are set.
Visual Studio Code
One of my favorite editors; VS Code, so I want to make sure it’s available on my WVD as well for users to use. Similar to the browsers VSCode is available in a user based installation as well as machine or system based installation. As we are working with a multi-user system, its best to use the system based installer to avoid every user from having the installer in their profile.
Download the installer https://go.microsoft.com/fwlink/?linkid=852157 and copy it over to the VM (or download via invoke-webrequest on the VM).
After copying, install the package with administrative privileges
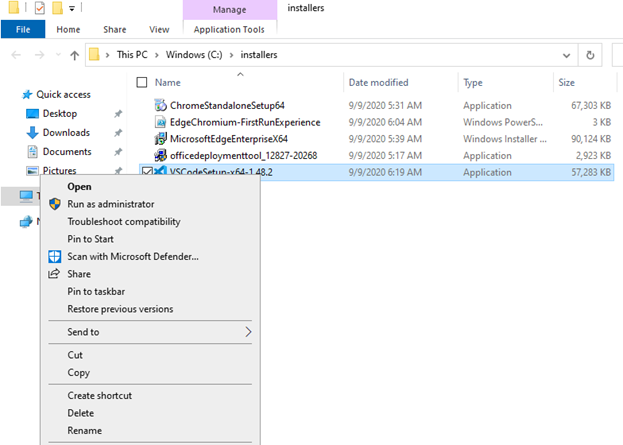
Install the application as desired (I always add the “Open with Code” to the Windows Explorer file context menu as well as the Explorer directory context menu (right click) and register it as an editor for all supported file types:

After installation, launch the application and add the desired extensions to it (such as PowerShell, Azure Automation, whatever you need your users to have).
Office 365
Which then brings us to the big beast, Office 365. There is a whole page dedicated from Microsoft on installing Office 365 Enterprise onto WVD/RDS computers. This chapter will derive its information from there, but make sure to check it out to see if there are any updates in the Install Microsoft 365 Apps on a shared virtual machine.
Download and copy the Office Deployment Tool and extract the tool to c:\installers\office. Next, head to the Office Customization Tool (https://config.office.com/deploymentsettings) to configure your custom installation XML.
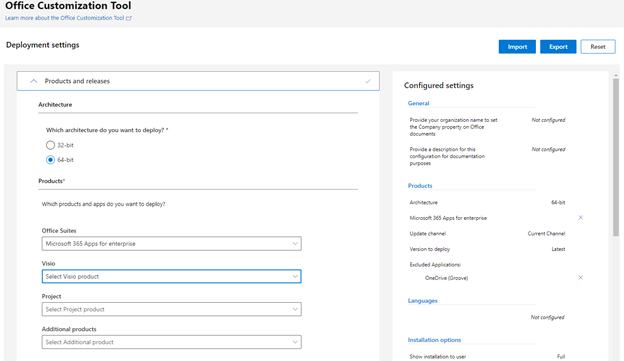
Set the application to Microsoft 365 Apps for Enterprise, disable
- Skype for Business (we will be using Teams)
- OneDrive Desktop (will have another method for that)
- Teams (will have another method for that)
Leave the defaults on the Installation page and click Next
On the Update and upgrade page click Next
On the Licensing and activation page
- Select Automatically accept the EULA
- Set Production Activation to Shared Computer
Click Next on the General page
Click Finish
On the top of the page, click Export and on the pop-up select Keep Current Settings and click OK. Accept the license terms and give the configuration a name (WVDOffice) and click Export. An xml file will be downloaded, copy this over to the master image in the Office Deployment Toolkit folder.
Open an administrative command prompt and execute (in the Office Deployment Toolkit folder);
setup /download wvdoffice.xml
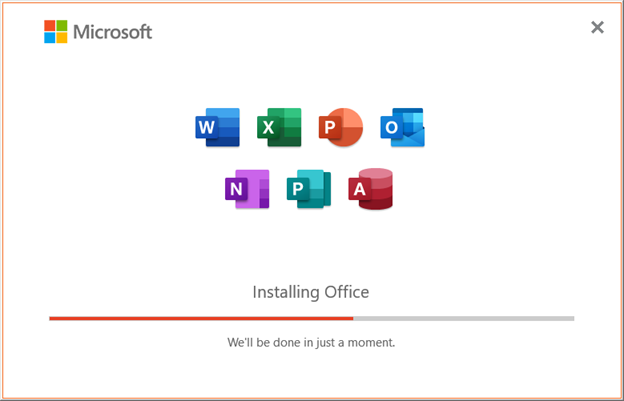
This will download the installer for Office. To install the applications according to the set configuration, run:
Setup /configure wvdoffice.xml
Which brings us to OneDrive for Business next,
OneDrive for Business
First, let’s download the OneDrive for Business machine installer at https://go.microsoft.com/fwlink/?linkid=2083517
And start the installers for all users:
OneDriveSetup.exe /allusers
Which brings us to Teams
Teams
There is a way to install Teams with advanced Audio/Video capabilities which are required when using WVD. For this, we first need to create a registry entry, open a PowerShell window with administrative privileges and execute the following:
New-Item -Path HKLM:\SOFTWARE\Microsoft\Teams\
New-ItemProperty -Path 'HKLM:\SOFTWARE\Microsoft\Teams\' -Name IsWVDEnvironment -Value 1 -PropertyType DWORD
Next, download the required software and place it in the installers folder, then open a command prompt and execute the installer as followed:
msiexec /i c:\installers\Teams_windows_x64.msi ALLUSERS=1 ALLUSER=1
Install the Microsoft Visual C++ Redistributable x64, which can be downloaded from: https://aka.ms/vs/16/release/vc_redist.x64.exe
And finally install the WebRTC client from: https://query.prod.cms.rt.microsoft.com/cms/api/am/binary/RE4AQBt
Which concludes the Teams install.
FSLogix
Because we want our user profiles to be stored on an external file server we will need to install the FSLogix client. This is a simple small installation that will receive its configuration from Group Policies (or set through registry entries). In this example I will just install the client and leave the configuration to GPO.
Download the agent on https://aka.ms/fslogix_download and extract the ZIP file. From there run the FSLogixAppsSetup.exe in the x64\Release folder.
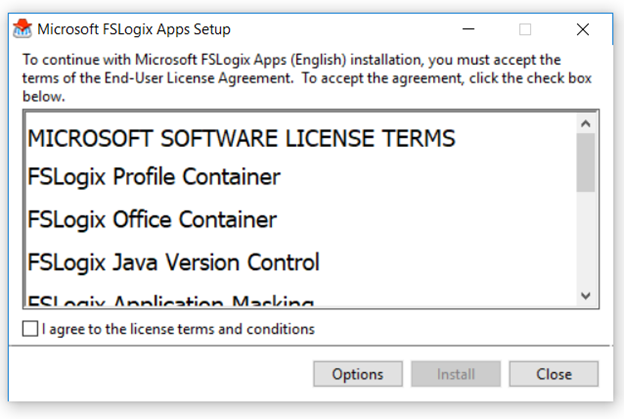
Accept the terms and such and complete the install. No further configuration required.
Profile Setup
Windows uses a default profile to assign to all new users logging into the system. As we will be using FSLogix for roaming profiles, what will happen is the following: a new user logs into our WVD system. The defaut profile is copied to the new user profile in the FSLogix container. The next time the user logs into our system, the FSLogix container is mounted and the user receives their user specific profile. So what we want to do is to have that default profile setup in such a way that our users can start immediately, it can have different backgrounds, startmenu items etc.
Configure the start menu you want it and then copy the start menu layout. Open a PowerShell in administrative mode and execute the following command:
Export-StartLayout -Path C:\Users\Default\AppData\Local\Microsoft\Windows\Shell\LayoutModification.xml
This will copy the start menu items and quick links from the start menu to the default user profile.
If you need to copy specific shortcuts, documents, favorites, music or videos, please them under C:\Users\Default\ in my case I have added a shortcut to blog.azureinfra.com in the Favorites folder. (note that the default users folder is hidden, just type the full path in an address bar of Explorer and you will get to it).
For the Theme, you can copy the current user theme to the default user theme location
PS C:\Users\rzomerman> copy .\appdata\Local\Microsoft\Windows\Themes* C:\Users\default\appdata\Local\Microsoft\Windows\Themes\
Now most properties (including the active theme) are stored in the registry. And that registry also has a .default user entry that we can play around with. For this, expand the HKEY_LOCAL_MACHINE hive and then go to the File menu and select Load Hive. Browse to C:\Users\default\NTUSER.DAT. In the pop-up type DEFAULT and click OK.
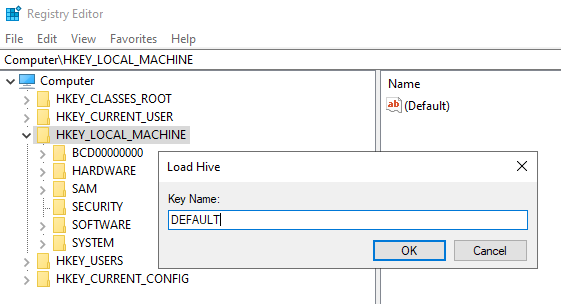
This loads the default user registry hives and we can add/change the keys as desired.
Once you know the name of the theme that is activated, you can enable this for the default user by adding the following key:
[HKEY_LOCAL_MACHINE\DEFAULT\SOFTWARE\Policies\Microsoft\Windows\Personalization]
"ThemeFile"="c:\Users\Default\AppData\Local\Microsoft\Windows\Themes\custom.theme"
With the other options we have available (see below) exporting the current user configuration in a .reg file and importing it back into the right registry hive seems to be a good idea.
Take the configuration setting you want, such as
HKCU:Software\Microsoft\Windows\CurrentVersion\Explorer\Advanced and export it into a .reg file. Next open the file in VS Code or any other editor and change the registry paths to the default one
For example:
HKEY_CURRENT_USER\SOFTWARE.…. becomes
HKEY_LOCAL_MACHINE\DEFAULT\SOFTWARE.…
Then import the reg file again to import the settings to the default profile.
Other options you can enable in the registry are (source):
Turn on File Extensions \Software\Microsoft\Windows\CurrentVersion\Explorer\Advanced\HideFileExt = 0/1
Turn on Hidden Files
\Software\Microsoft\Windows\CurrentVersion\Explorer\Advanced\Hidden = 0/1
Set File Explorer / Computer to Default to THIS PC
\Software\Microsoft\Windows\CurrentVersion\Explorer\Advanced\LaunchTo = 1
0 = does not work
1 = THIS PC
2 = QUICK ACCESS
Disable PEOPLE on Taskbar
\Software\Microsoft\Windows\CurrentVersion\Explorer\Advanced\People\PeopleBand = 0
If you need to add PEOPLEBAND it is a DWORD(32Bit)
0 = PEOPLE off
1 = PEOPLE on
Set Cortana Search box to Off
\Software\Microsoft\Windows\CurrentVersion\Search\SearchboxTaskbarMode = 0
If you need to add SearchboxTaskbarMode it is a DWORD(32Bit)
0 = Cortana Search Box Off
1 = Cortana Search Icon is On
2 = Cortana Search Box is On
Show Taskbar Buttons on Taskbar Where Window is Open
HKEY_CURRENT_USER\Software\Microsoft\Windows\CurrentVersion\Explorer\Advanced\MMTaskbarMode = 2
0 = Show taskbar buttons on all taskbars
1 = Show taskbar buttons on main taskbar and taskbar where window is open
2 = Show taskbar buttons on taskbar where window is open
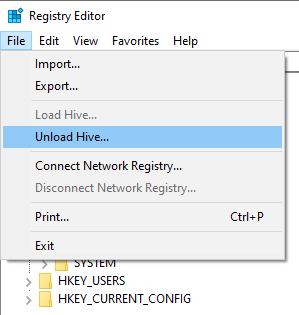
Once you are done with the registry, do not forget to unload the hive else you will corrupt the Registry and default profile
File associations
For file associations, you can export them and place the exported file into c:\installers and import this using a single login script upon boot:
dism /Online /export-defaultappassociations:c:\installers\extensionassociation.xml
For the import and activate it for all default users, we need to run:
dism /online /Import-DefaultAppAssociations:c:\installers\extensionassociation.xml
Finalizing
Now that we have our master image near ready we need to optimize it for WVD. This means removing specific software, setting policies etc.. and to help us with that, another PowerShell script is available but we run it only after deploying the WVD nodes. The following registry keys can also be implemented through a GPO.
Disabling Windows Updates as we want to manually control it
reg add "HKLM\SOFTWARE\Policies\Microsoft\Windows\WindowsUpdate\AU" /v NoAutoUpdate /t REG_DWORD /d 1 /f
Time zone redirection so users logging in will have their own timezone set, not the timezone of the WVD:
reg add "HKLM\SOFTWARE\Policies\Microsoft\Windows NT\Terminal Services" /v fEnableTimeZoneRedirection /t REG_DWORD /d 1 /f
Disable Storage Sense as we don’t want the system to go background scanning files and such when other people are still logged on:
reg add "HKCU\Software\Microsoft\Windows\CurrentVersion\StorageSense\Parameters\StoragePolicy" /v 01 /t REG_DWORD /d 0 /f
Testing
In order to test if the default profile is as you want it right now is to login with another user that has never logged into the machine. Or, prior to logging in with that user to delete their profile information from this machine. Note that FSLogix should not have been setup for these users (or these users should have been excluded from FSLogix – which you can do by adding them to the exclusion group on the VM).
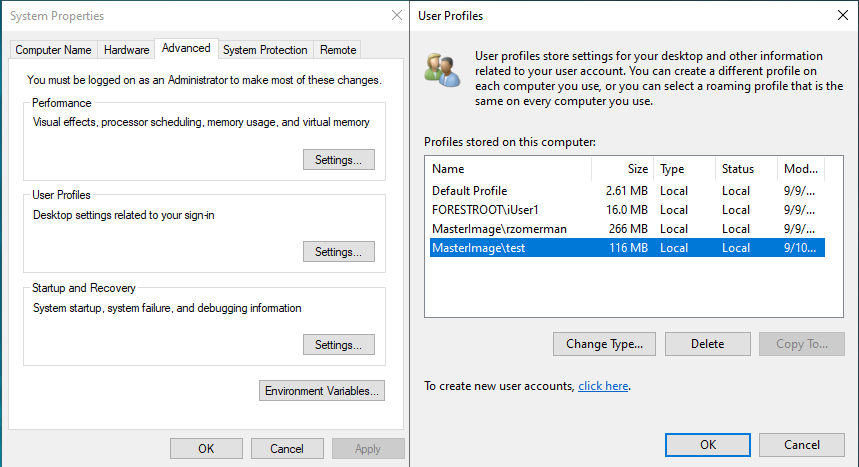
If you need to delete the profile (to reset it), go to the computer object, there select advanced settings and click settings for the User Profiles. There select the profile you want to delete and you can try to relogin again to test
Preparing to sysprep
We want to make an Out-of-Box Experience (OOBE) so Azure can redeploy VM’s based on this master image. In order to do this, we use SysPrep to repackage and shutdown the VM. But before we do that, we need to remove the computer from the domain, reboot it and make sure all updates are in place.
To remove the computer from the domain, use the following PowerShell command:
remove-computer -credential domain\administrator -passthru -WorkgroupName "Sysprepped" -Force -Restart
Provide the credentials for the administrator account to remove the computer from the domain. After the restart, go to start-run (Windows-R) and type:
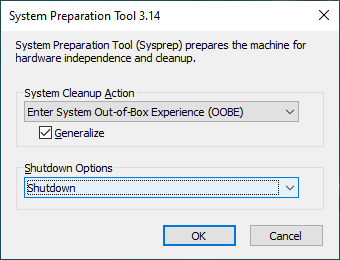
c:\windows\system32\sysprep\sysprep.exe
On the System Preparation Tool, make sure to select Generalize and set the shutdown option to shutdown and click OK.
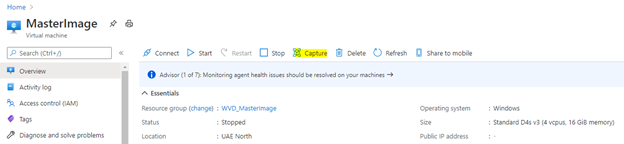
Sysprep will be working for a couple of minutes and ultimately the VM will be shutdown. Now from the portal we can convert this VM into an Image, by clicking the capture button
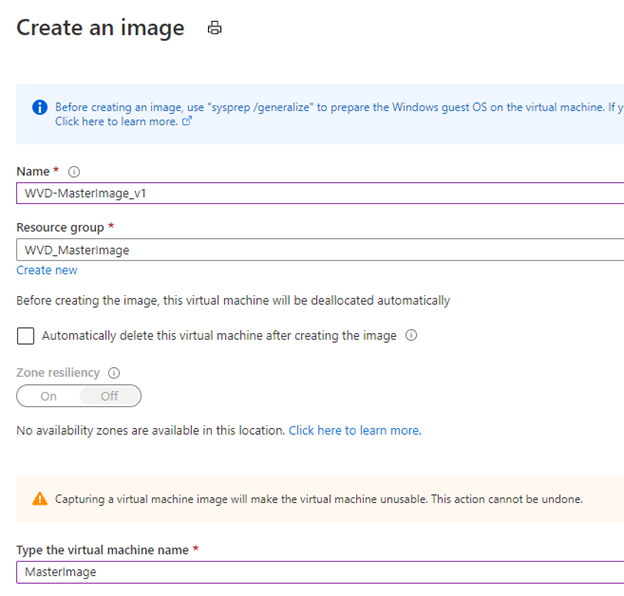
You can provide a name for the image (I’d recommend putting a version or date in the name for ease of use) and the resource group you want the image to be created in. Optionally you can delete the VM (it will not be usable anymore anyway as we’ve generalized it) and you need to type the VM name itself.
Now after the image is created, we can test if the image actually deploys alright. Just go to the newly created image and select Create VM from the Overview menu. Provide the usually details, such as what you want to name the VM, the network etc etc.. remember this is just a test VM to test if the image is as we want it.
Conclusion
Creating your own VM image isn’t really that hard, but you do need to grab the right software installs to avoid user based installations. In our next post we will be looking into the WVD optimization script made by the Windows Virtual Desktop Team to remove all those unwanted extra applications such as 3D viewer, Xbox applications and much more!